Student #1 - The gas particles expanded because there was empty space.
Student #2 - Gases like to fill their container.
Student #3 - The balloon filled up because there was a vacuum.
There is a common misconception or lack of conception about gas particle motion. The ideas start when students are very young as we teach them about solids, liquids and gases very early. To compensate for the fact that students are not ready for the particulate level at this age we use observations of what happens at the macroscopic level. Liquids take the shape of the container but do not fill it. Gases fill the container and take its shape. Solids are unaffected by their container. Even though we do not express the particle level (or do so very poorly) students will still formulate ideas about why these differences exist. By the time students finally get to a chemistry class where they can connect the macroscopic and particulate levels there are significant obstructions in place.
There are a number of demonstrations available to test these obstructions and misconceptions and get students thinking. But teachers must be very wary of oversimplifying the demonstration and offering their own explanations. This can cause students to reinforce their misconceptions. Instead focus on observations and begin providing students with the tools to organize particle level pressure analysis based on speed/temperature, direction, number of particles, size of the container and surroundings. For an example consider the demonstration where a balloon is blown up backwards using a flask with hot water.
Initially the flask has mostly air in it at a similar pressure to the surrounding atmosphere. As the flask is heated, steam pushes some of the air out leaving the flask to contain steam and some hot air. There is a smaller density of particles in the flask than out because the higher speed creates a similar pressure with fewer particles. If there were the same density of particles in the flask as outside then the higher speed would result in a greater pressure in the flask than the atmosphere. A greater pressure would mean more frequent collisions with the the container, and also the hole which would lead to more particles leaving the flask than entering. It is only when the particle density is smaller in the flask that the pressure will be the same.
Now the balloon gets placed on the flask and the flask is removed from the hot plate. The particles in the flask begin to slow down as the temperature drops. This causes fewer collisions and smaller collisions and thus a drop in pressure occurs. The external or atmospheric pressure is constant and thus becomes larger in pressure and the balloon is pushed in until the smaller volume in the flask reaches a similar pressure to the atmosphere again.
Now the balloon gets placed on the flask and the flask is removed from the hot plate. The particles in the flask begin to slow down as the temperature drops. This causes fewer collisions and smaller collisions and thus a drop in pressure occurs. The external or atmospheric pressure is constant and thus becomes larger in pressure and the balloon is pushed in until the smaller volume in the flask reaches a similar pressure to the atmosphere again.
In order for the student to properly analyze such a situation they really need to articulate multiple steps and critically analyze the number of particles, volume of container, speed of particles and how each of these affects the overall pressure. This task can be aided by using particle level drawings but it is indeed a formidable task. Most students being overwhelmed with this task resort to adding in human features to the particles instead. The particles have less space so the air particles move in to fill the empty space. An underlying feature of these student alternative conceptions is that particles will move towards an empty space but students do not realize why this occurs. This is crucial to eradicating some of the structures that we begin with. To begin addressing this have students draw a simple diagram with multiple colors and motion in multiple directions such as in Figure 1 below.
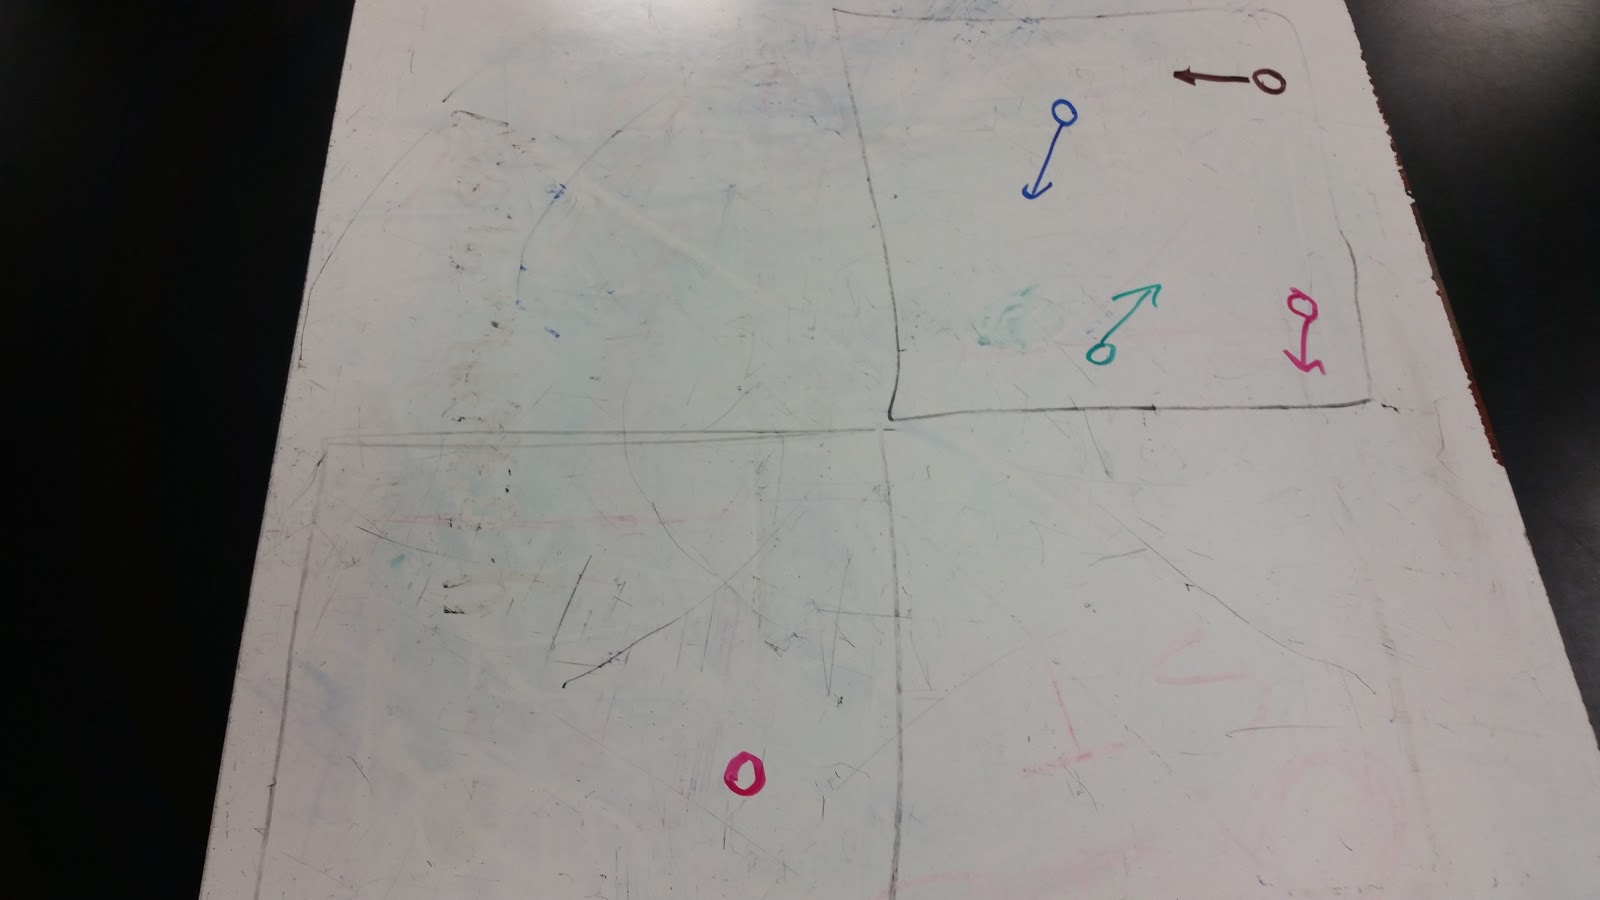
Figure 1: Student representation of an initial state of a gas.
Then instruct the students to determine where the particles will be a short time later (IE after the time needed to move the length of each arrow). Have them draw four different diagrams in sequence showing the particles’ positions based on their motion.
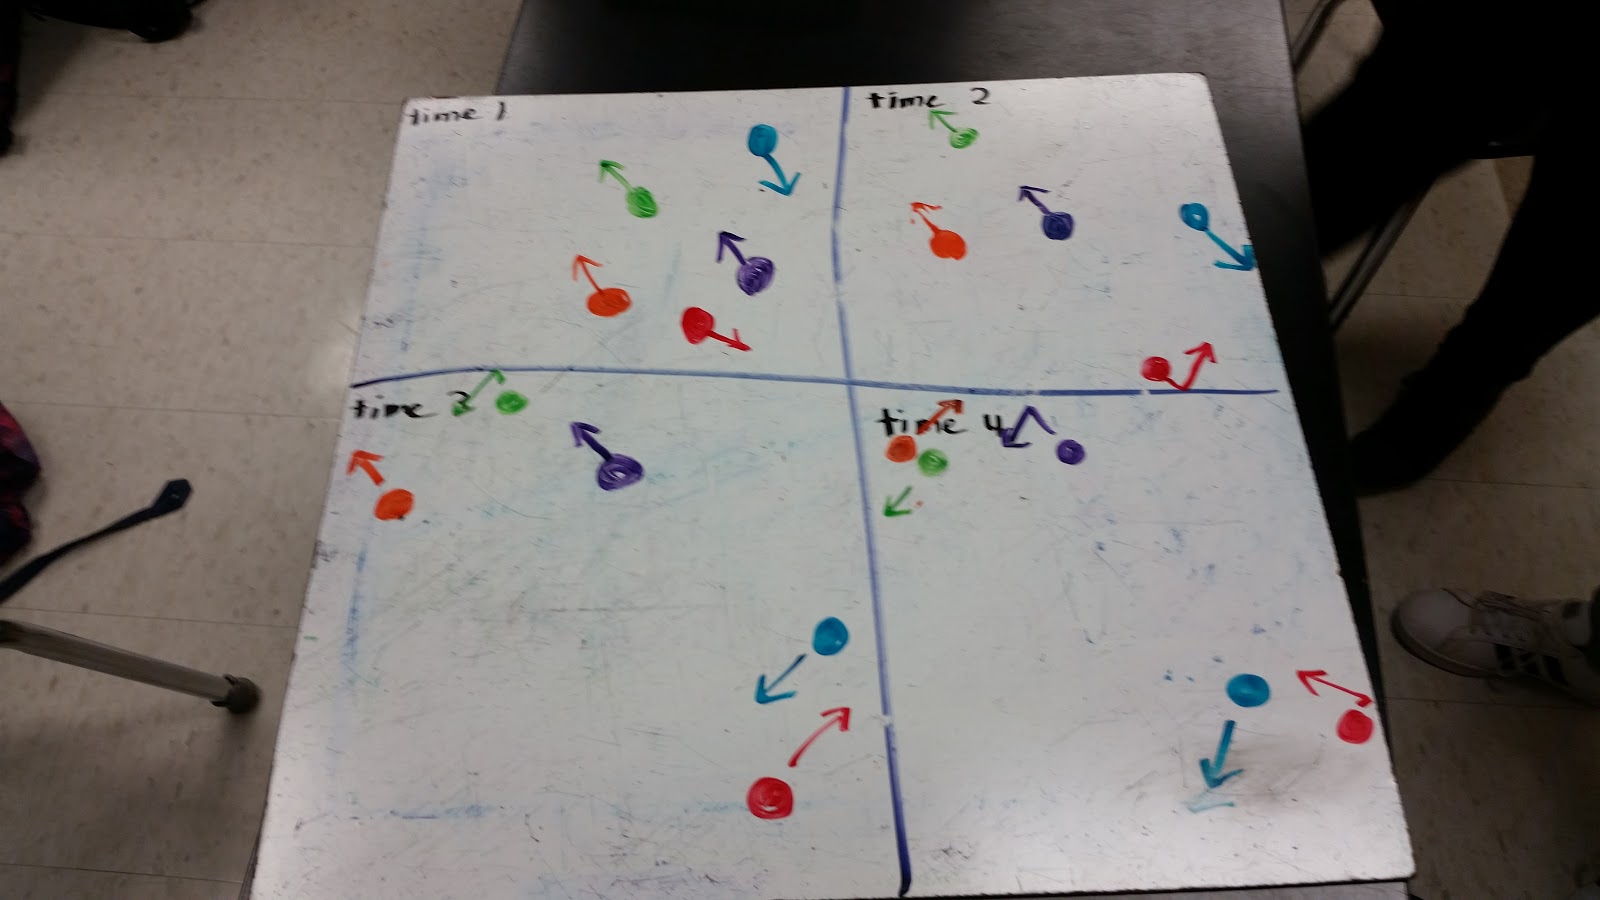
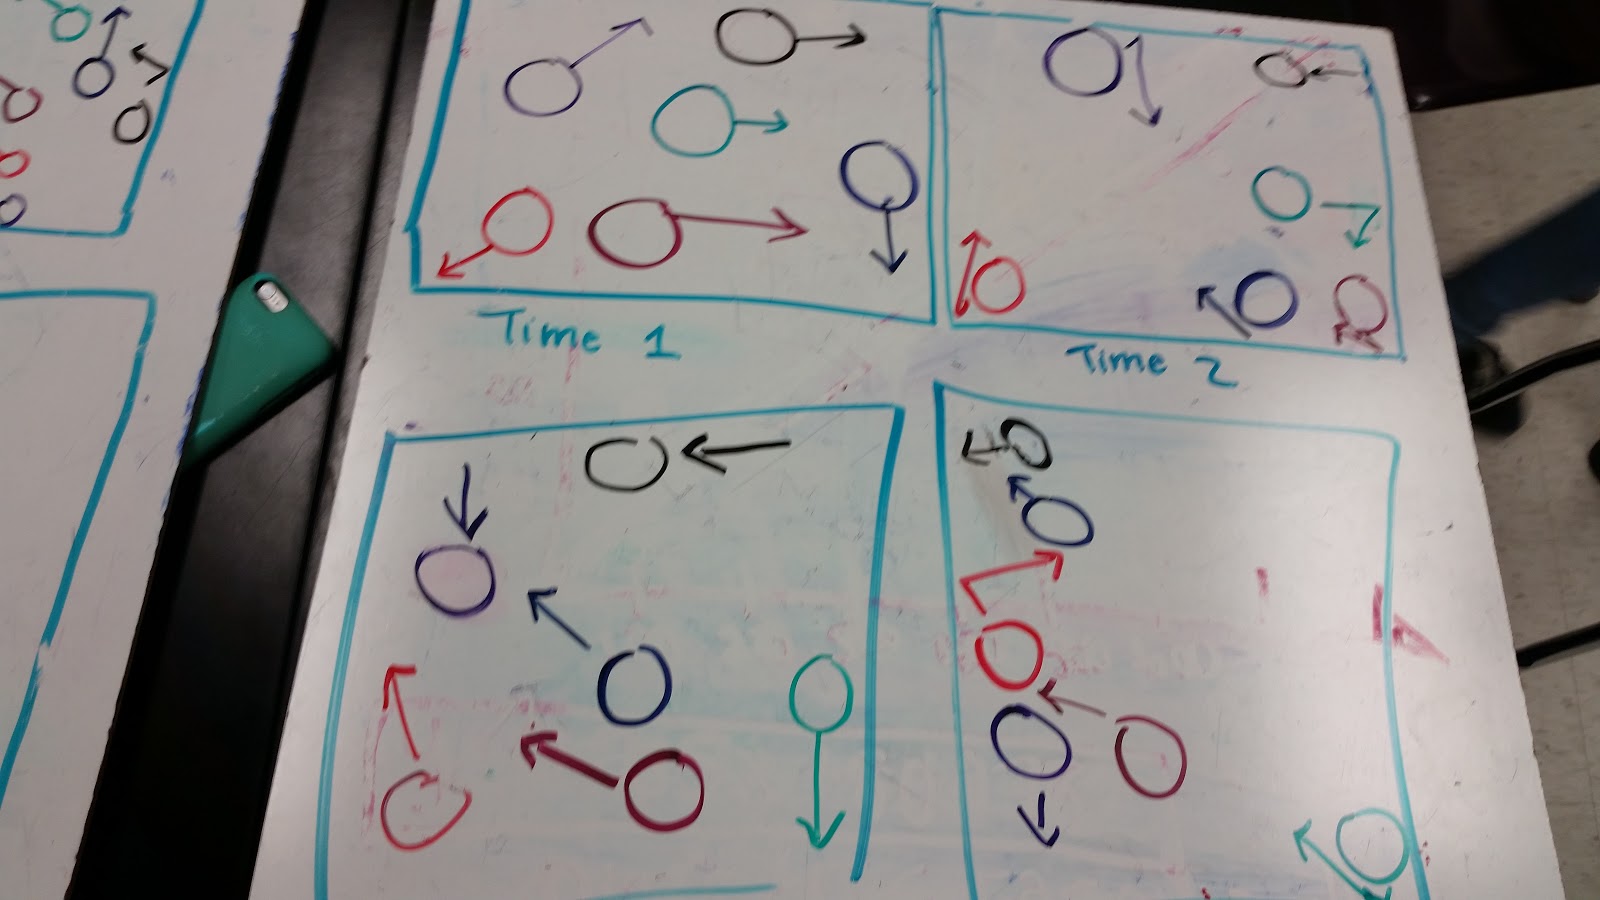
Figure 2: Student works showing how the particles move about based on their initial positions and motions
Ask the students why the particles moved the way that they did. Ask clarifying questions if needed such as should the particles change speeds, will the particles collide with the walls and other particles? Try and emphasize that there is no special direction or cause of the motion but that the particles were just moving to begin with and thus changed where they were.
Now the plot twist.
Have the students restart on a new whiteboard if possible and draw a bunch of particles in one location such as in Figure 3 below.

Figure 3: Students restart having all particles in 1 location (IE in a balloon)
Now have them complete the same process as before. They should note that as the particles move about that the particles spread throughout the container because the motions are in different directions and there is nothing to oppose their motions.
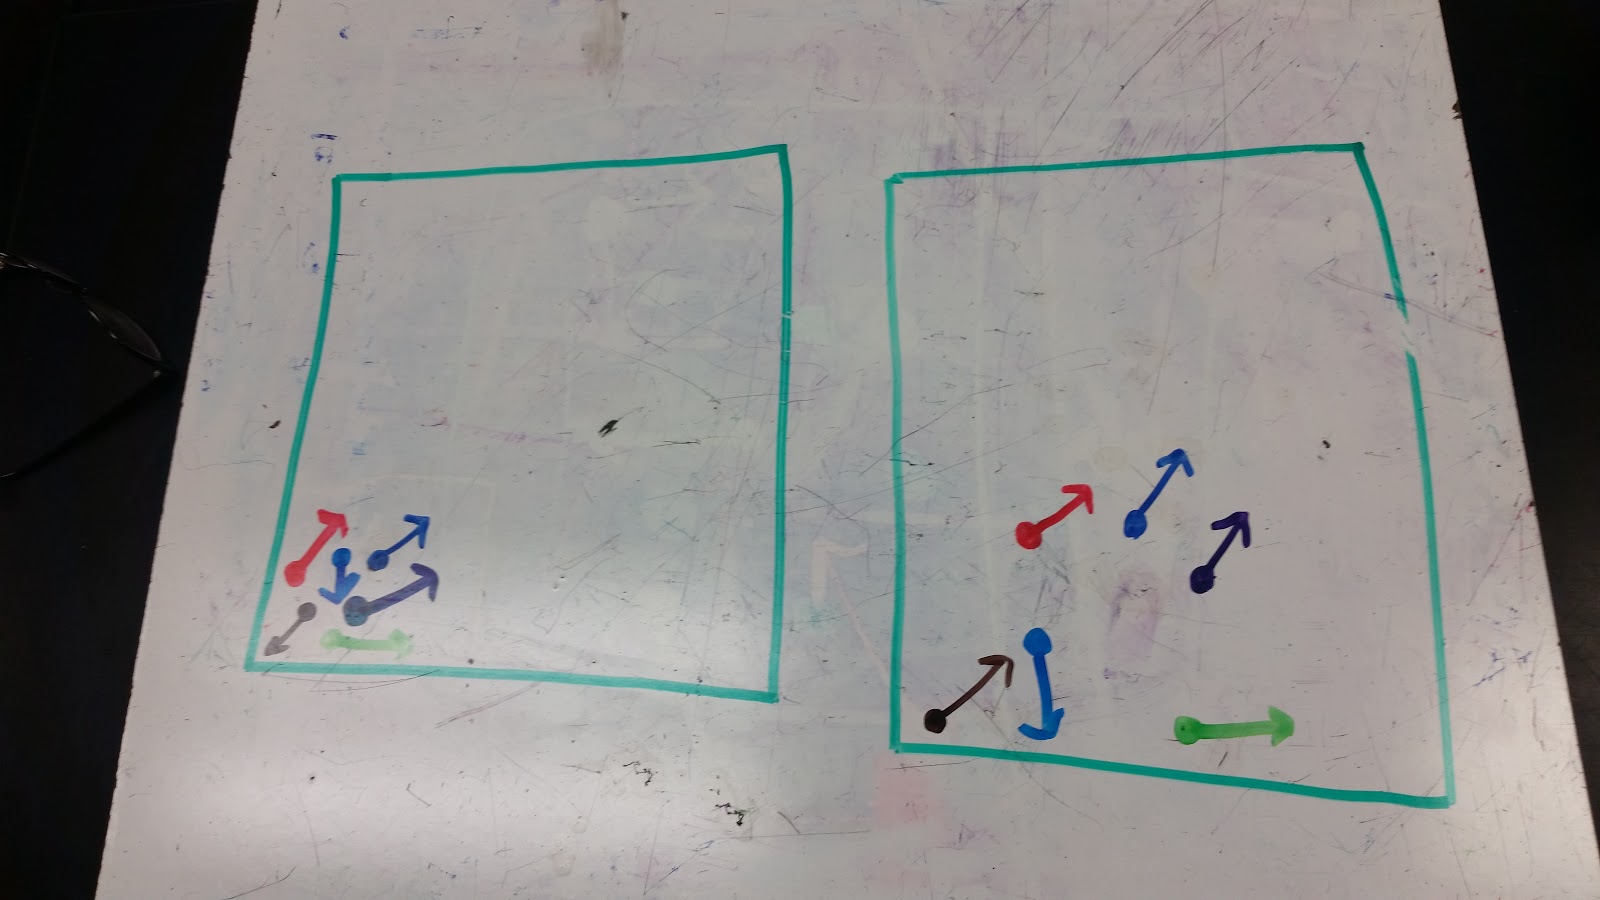
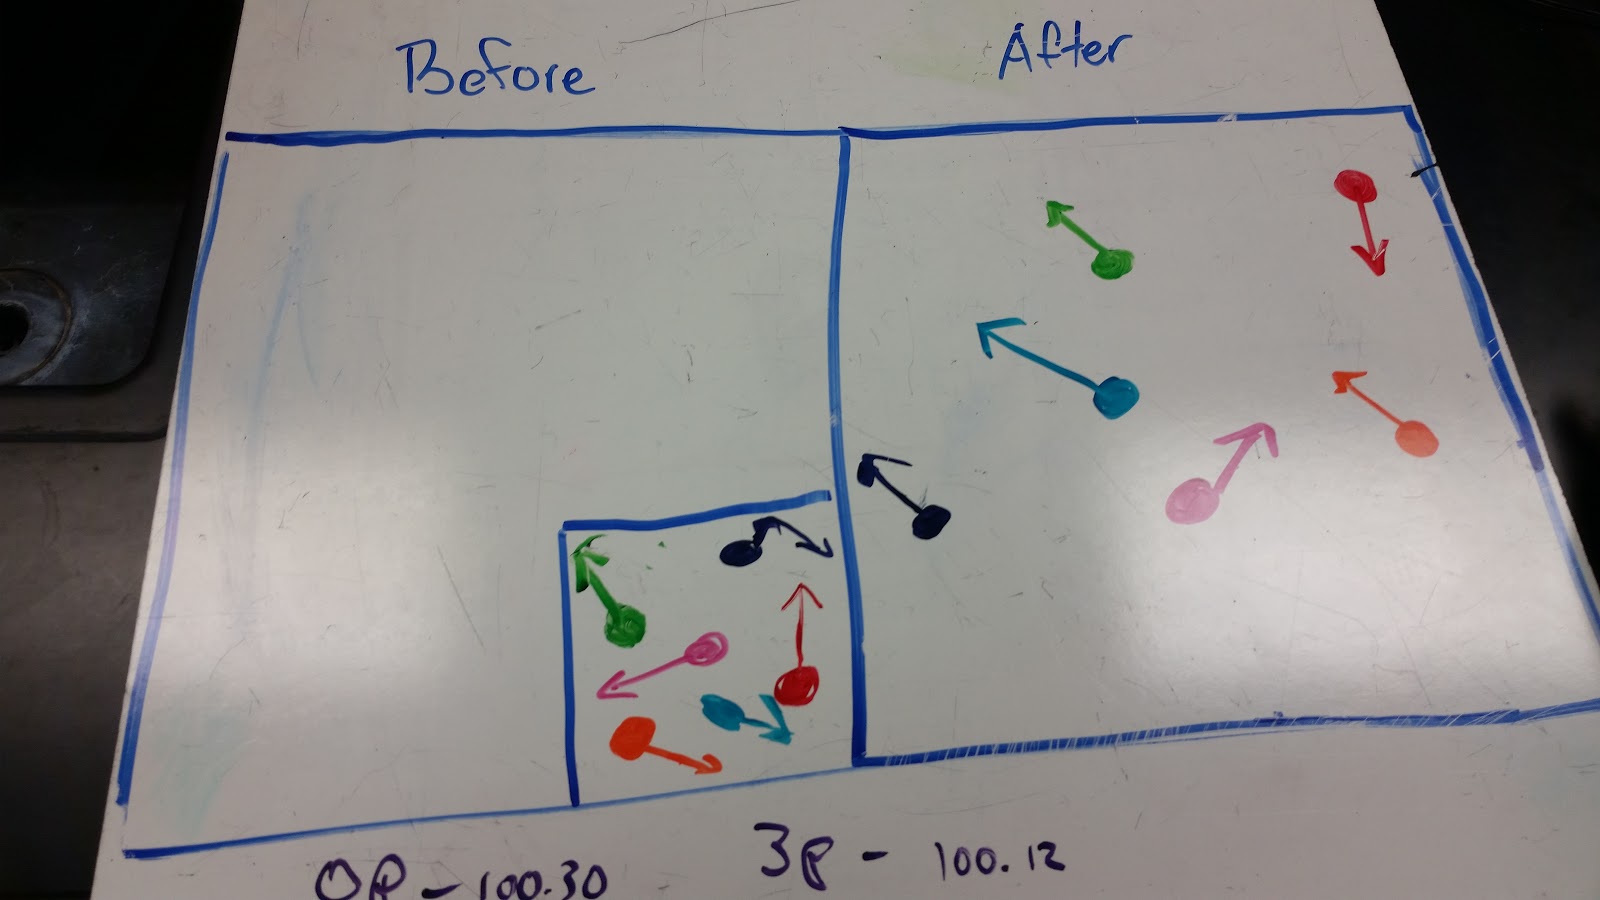
Figure 4: Gas particles starting in a confined space that become free to move around
Why did the gas particles fill the container? Was it because they like to spread out? Was there a big reason or did they just happen to be moving in a way where they would spread out for no reason other than they were already moving to do so? The particles that stay in the corner bump and collide causing them to change directions while those moving away from the corner are not impeded. There is no force needed for the particles to fill the container, there is no suction. The gas fills the container solely because gas particles move and they are moving in various directions. (AP Chemistry teachers might even have seen a professor express that it is equally likely that all particles could have all of the energy as an equally likely microstate as a somewhat even dispersal. This is false because the initial conditions make it impossible for that to occur.)
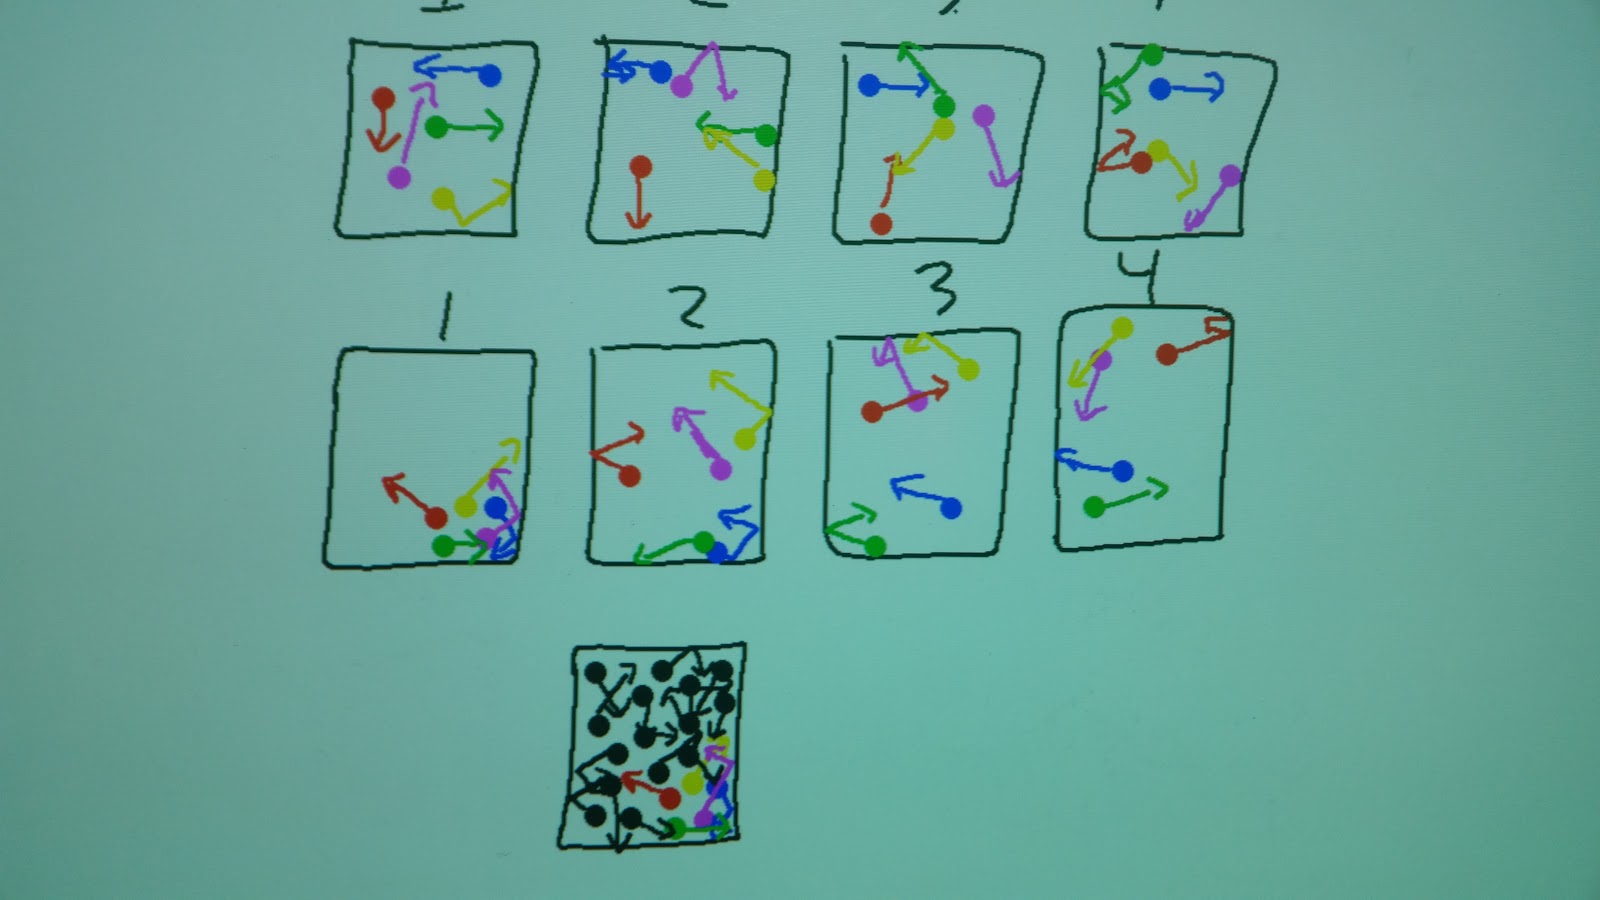
Figure 5: Teacher representation of gas particles moving and a confined gas that was released moving. The bottom image is a confined gas for comparison purposes.
In Figure 5 above one can see the difference between gas particles moving throughout an enclosed space and gas particles confined to one small section of a confined space. Did the left corner exhibit “suction” towards the particles? Did they move towards the empty space because they wanted to fill it? Absolutely not. Rather the fact that gas particles move in various directions as an intrinsic quality of the particles is all that is needed for the spread of particles to occur. There is no differentiation between the top series and the bottom series in Figure 5. There is no way for the empty space in the second series box 1 to pull or force the particles to move. There is no such thing as a suction force. A gas particle cannot be pulled. But there is an interesting tendency for the gas to spread based on the particles various motions.
A high-level discussion that may be appropriate is what happens when you breathe. It is probably natural for most people to assume that when they take a deep breath in, that they pull air in. If you breathe in right now it will appear to you that you are controlling the air. But you are not. Your lungs cannot exert a force on air outside of your body. Only the particles touching your lungs can be affected by your lungs. The air that moves in when you breathe in was already on its way towards your lungs, you just caused fewer particles to be restricting their motion in. By expanding your lungs using your muscles, fewer particles leave your mouth and the same amount of air is still moving towards your mouth and lungs as before. Thus a net flux of air in occurs. But those particles weren’t sucked in, or pulled into your lungs.
(This discussion might also bring up the misconception that air leaving a rocket causes the rocket to move forward, a common misconception from Newton’s 3rd law)
After discussing breathing I had students ask about slurping noodles and drinking out of a straw. Both were fantastic additions to the discussion as slurping requires contact between the substance and this makes it possible to create a force on the noodle particles. The straw of course is dependent on the external pressure. Some follow up concepts worth using to assess are why do gases move from high pressure to low pressure and modifying that with varying temperatures. For example, if a high temperature gas and low temperature gas have the same pressure, why is there not a net transfer of particles? Would the densities of the gases be different? What would happen if the hot gas cooled down? Do the collisions cause speeds to change? Do all gas molecules in a sample move at the same speed?
With a better understanding of why a gas will fill its container and a better model to work with students should now be ready to give a much better analysis of common gas law demonstrations. If anyone does the 2-L with a nail in it or the notecard on a mason jar filled with water; both of these demonstrations rely on a small amount of water leaking. This causes the trapped gas inside of the container to decrease in pressure because the space available increases from the small amount of water leaving. This causes the pressure from the atmosphere to be greater by enough to balance the pressure of the weight of the water and trapped gas. For the 2-L the water stays in as long as the cap remains on and for the notecard the notecard stays in place and prevents a student from being soaked.
If you use a vacuum pump to show marshmallow, balloon or shaving cream expansion make sure to explain to the students how the vacuum pump is engineered to allow particles to leave the glass dome and get pushed out by the engine, but particles are prevented from re-entering the dome. Vacuum filtration is always a much more visible representation of this that students that continue on to organic chemistry in college will likely see repeatedly.
When I first did gas pressure demonstrations the goals were simple. I wanted students to articulate that gas pressure was caused by collisions and that pressure could be exerted in multiple directions. But now I want them to be able to get to the point where they do higher levels of analysis of what is happening during demonstrations. I want them to organize when temperature changes and when it doesn’t. I want them to identify when there is a difference in particle densities. I also want them to avoid adding human qualities to gas particles and this exploration where students draw arrows and then follow them through like a comic book strip might just be the key to seeing that to fruition.
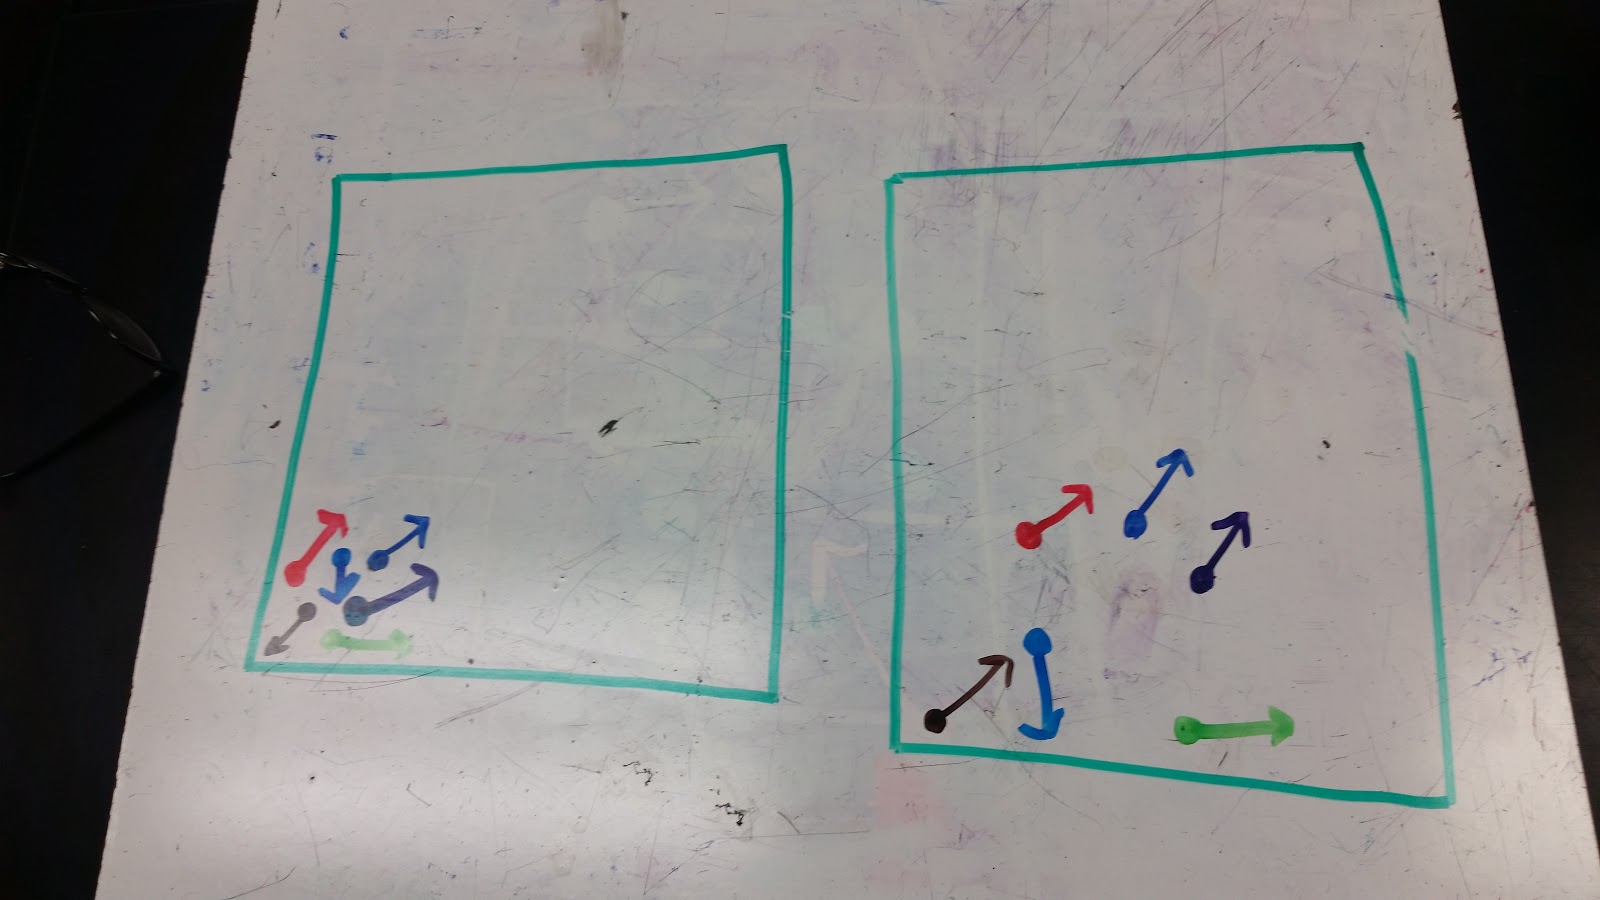
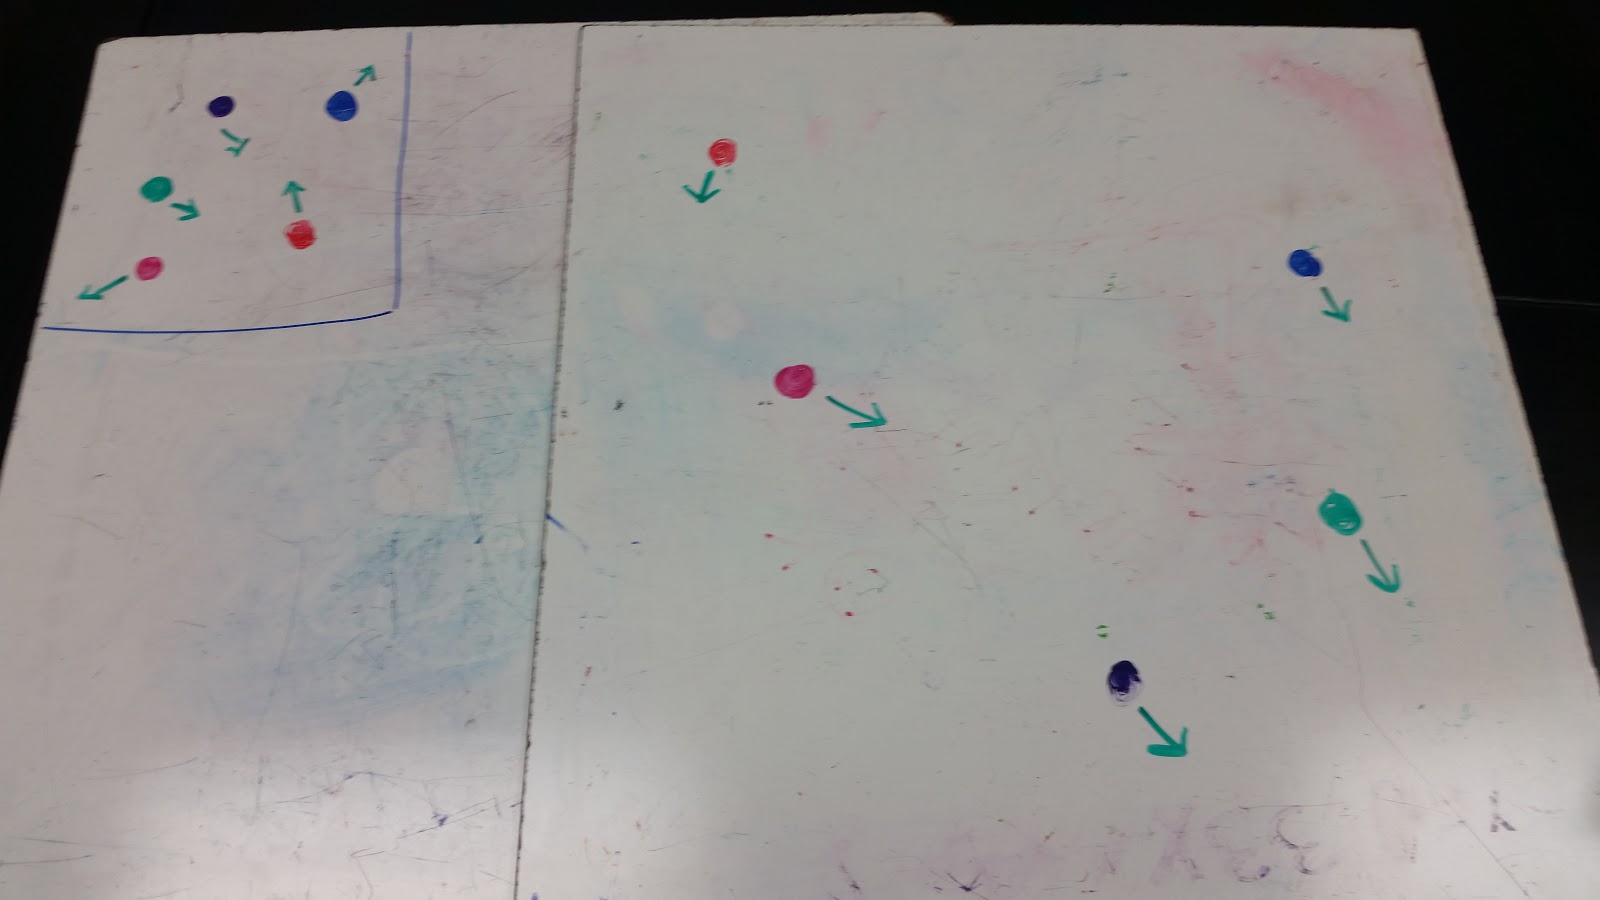

Figure 6: More student creations
