Activity 1: Spectral Emission Lines
Five “unknown” spectral tubes are set up around the room. The students were instructed on how to use the spectrometers and told to use a poster display to identify the five elements used on a whiteboard.
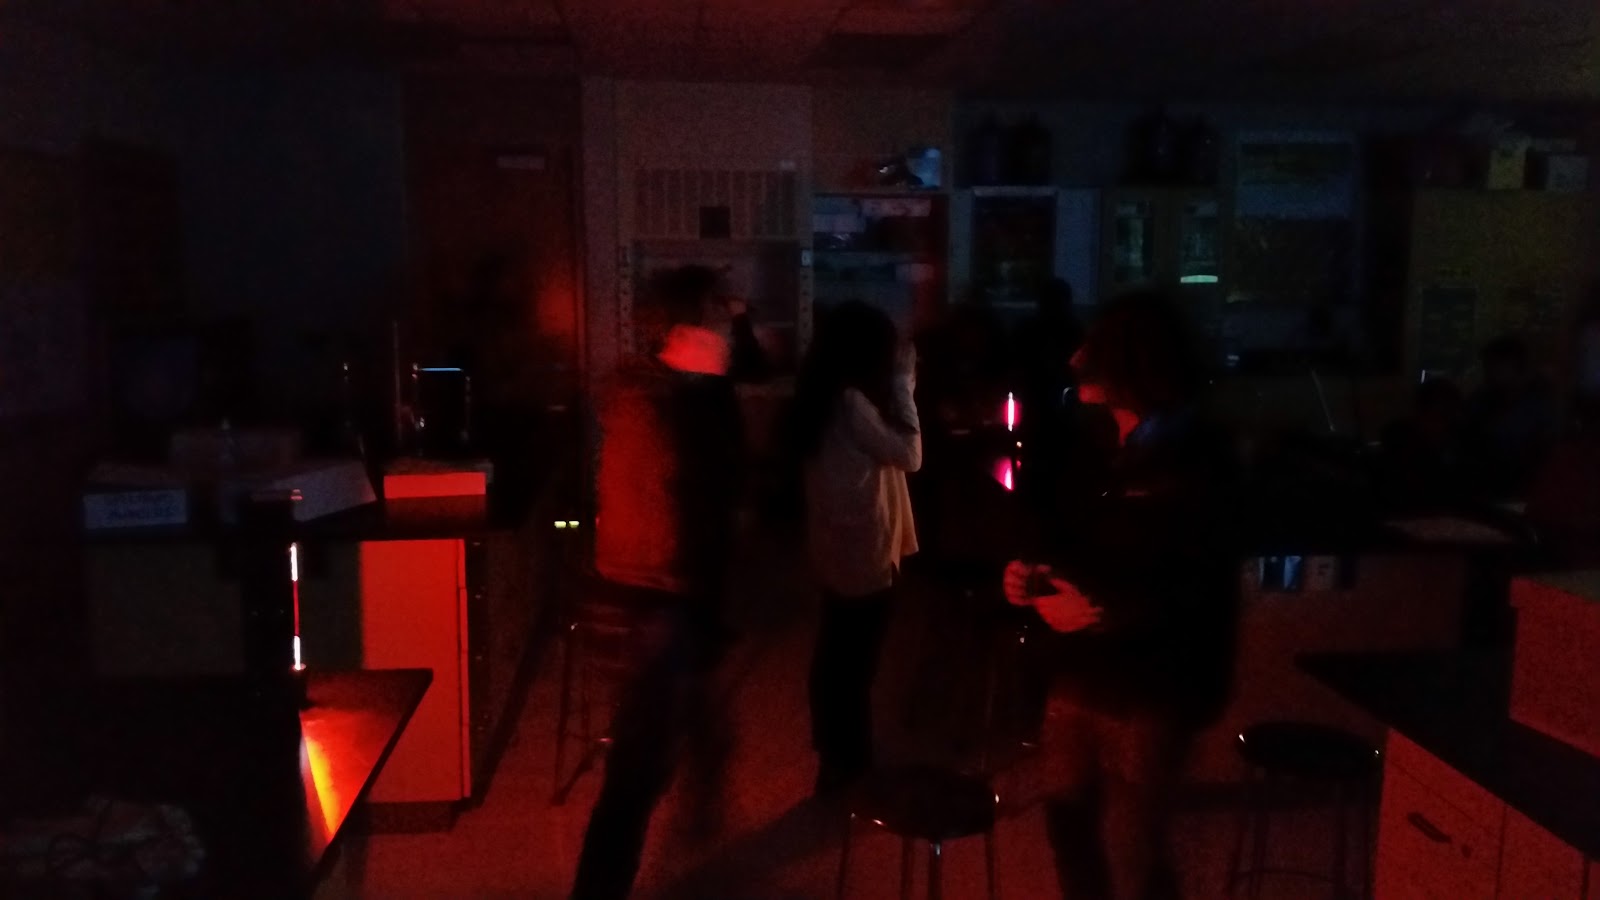
Figure 1: Students observing spectral emission light with spectroscopes.
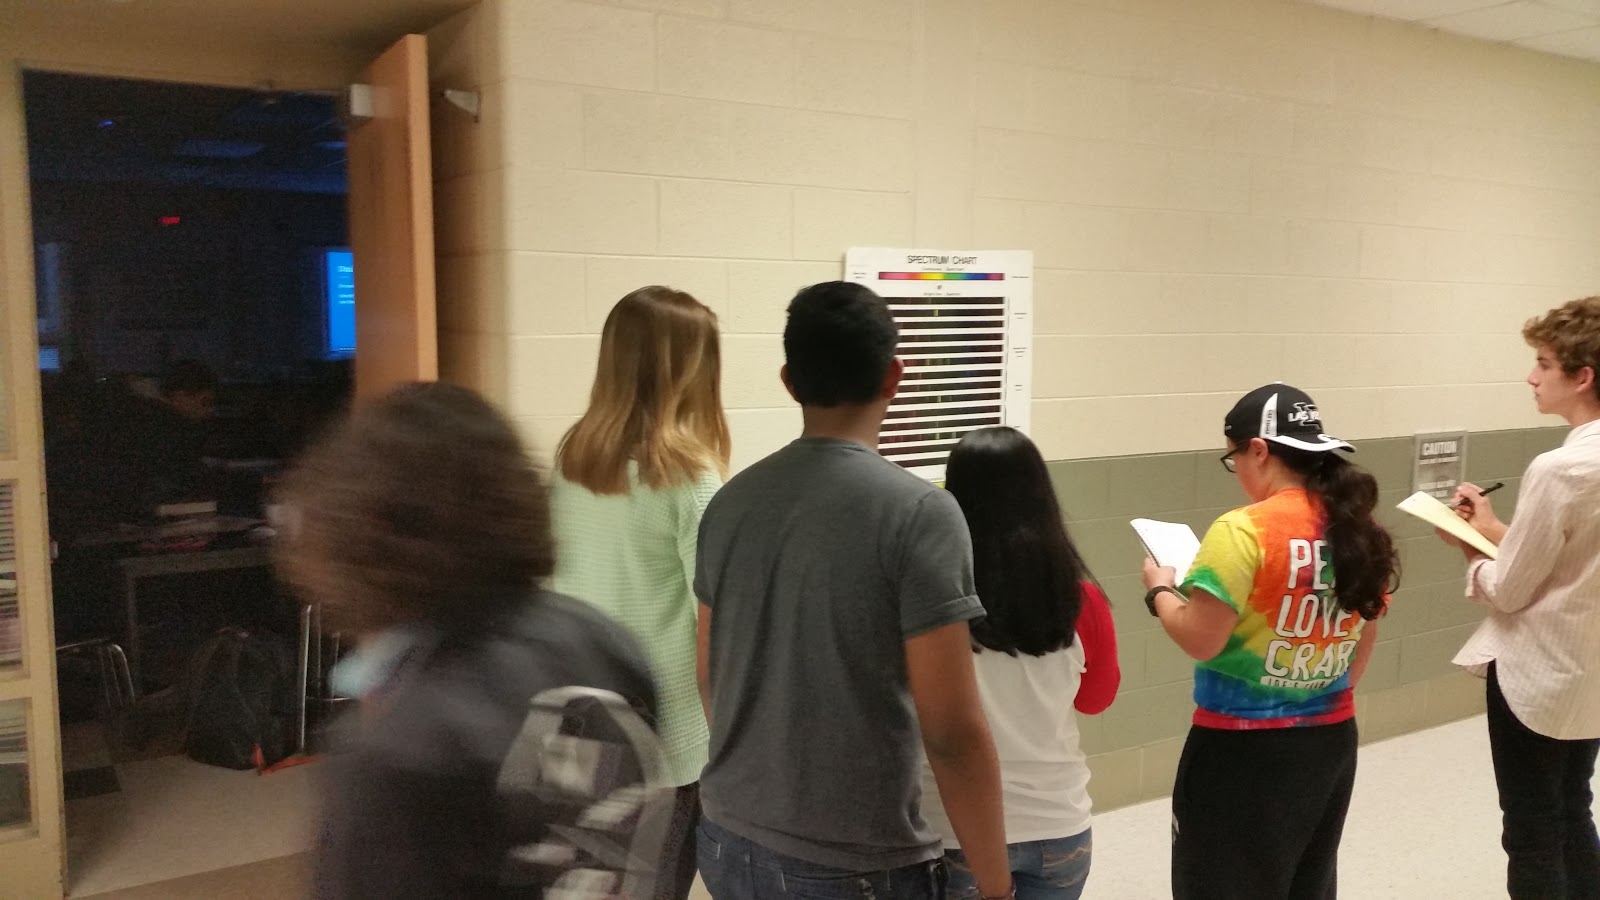
Figure 2: Students comparing spectral emission lines to determine the identity of 5 spectral tubes
After all whiteboards were set, the five were revealed. After this we shifted focus into why different elements would produce different colors of light. The students were informed that light is caused when a charged particle accelerates. The students were then instructed to complete a whiteboard particle diagram that shows two things:
- Why only some colors are produced from an element and not all colors (white light). For example, why does hydrogen only give off red, teal, violet and violet? Why not orange or yellow? What does this tell us about the motion of electrons in hydrogen?
- Why do different elements produce different colors from each other? Why is hydrogen different than helium, etc.?
The learning objective here is that there is a quantum limitation on the motion of electrons. The specific colors of light imply that the electron can change motion, but only to specific states that are restricted. This can be used to construct the Bohr model of the atom, but it is important to emphasize that the light is what we have to determine anything about the motion. There is no way to “see” the electrons moving nor accelerating.
Activity 2 - Flame Testing
The students were given a set of stations with various chloride salt solutions and two unknown salt solutions. The instructions given were to write down the color of each flame test, identify the two unknowns and construct a whiteboard identifying what was happening to the salts in the flame.
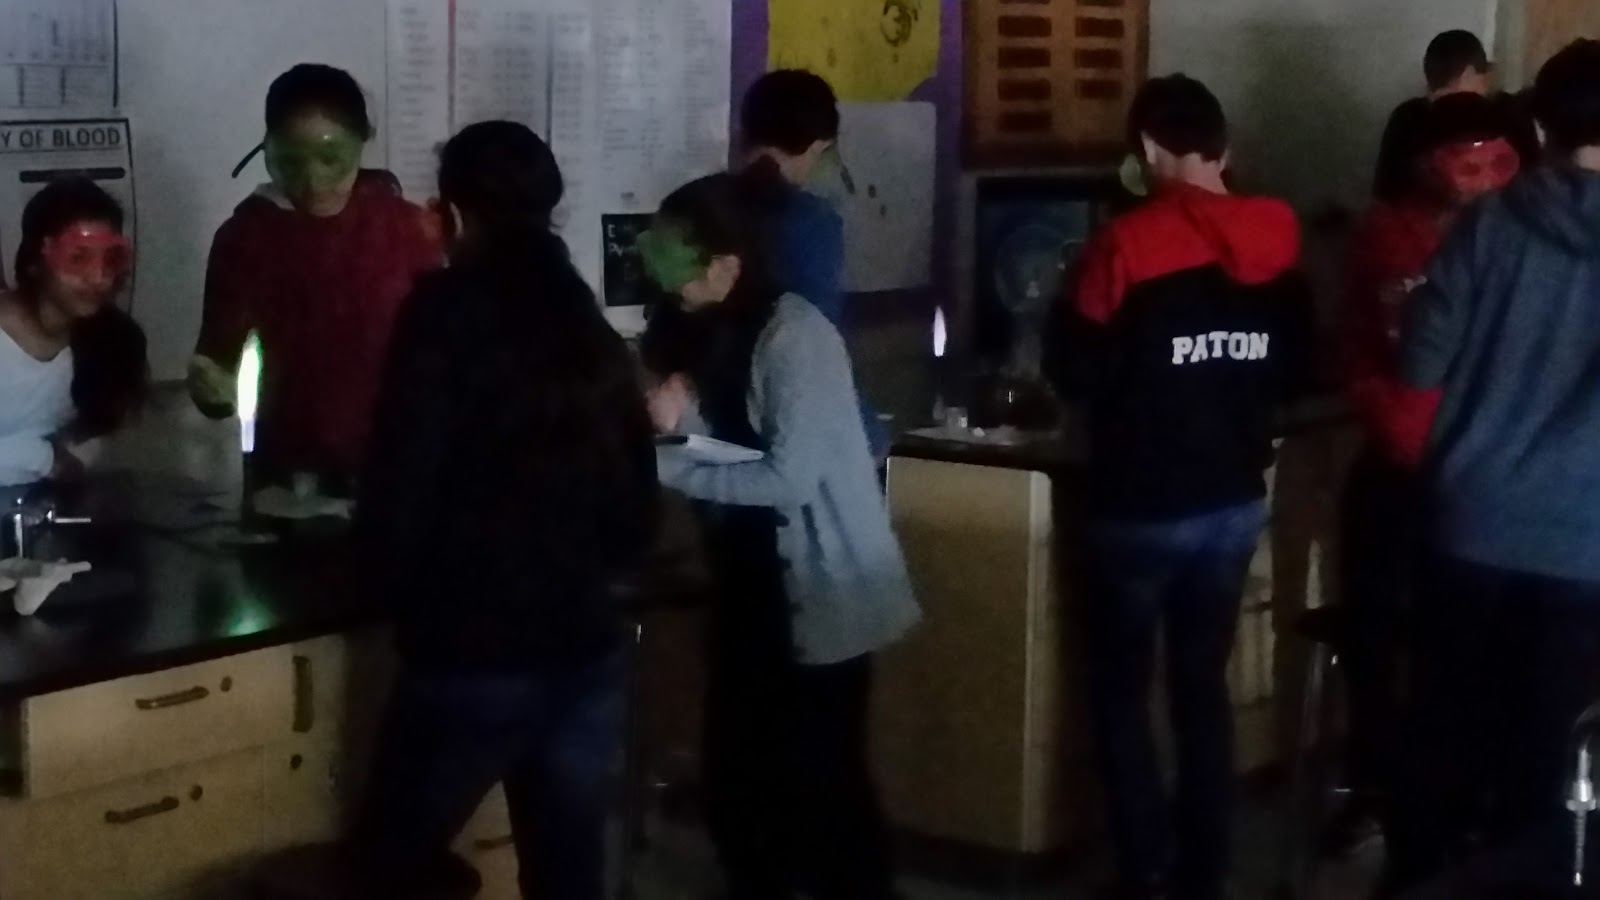
Figure 3: Students performing flame tests
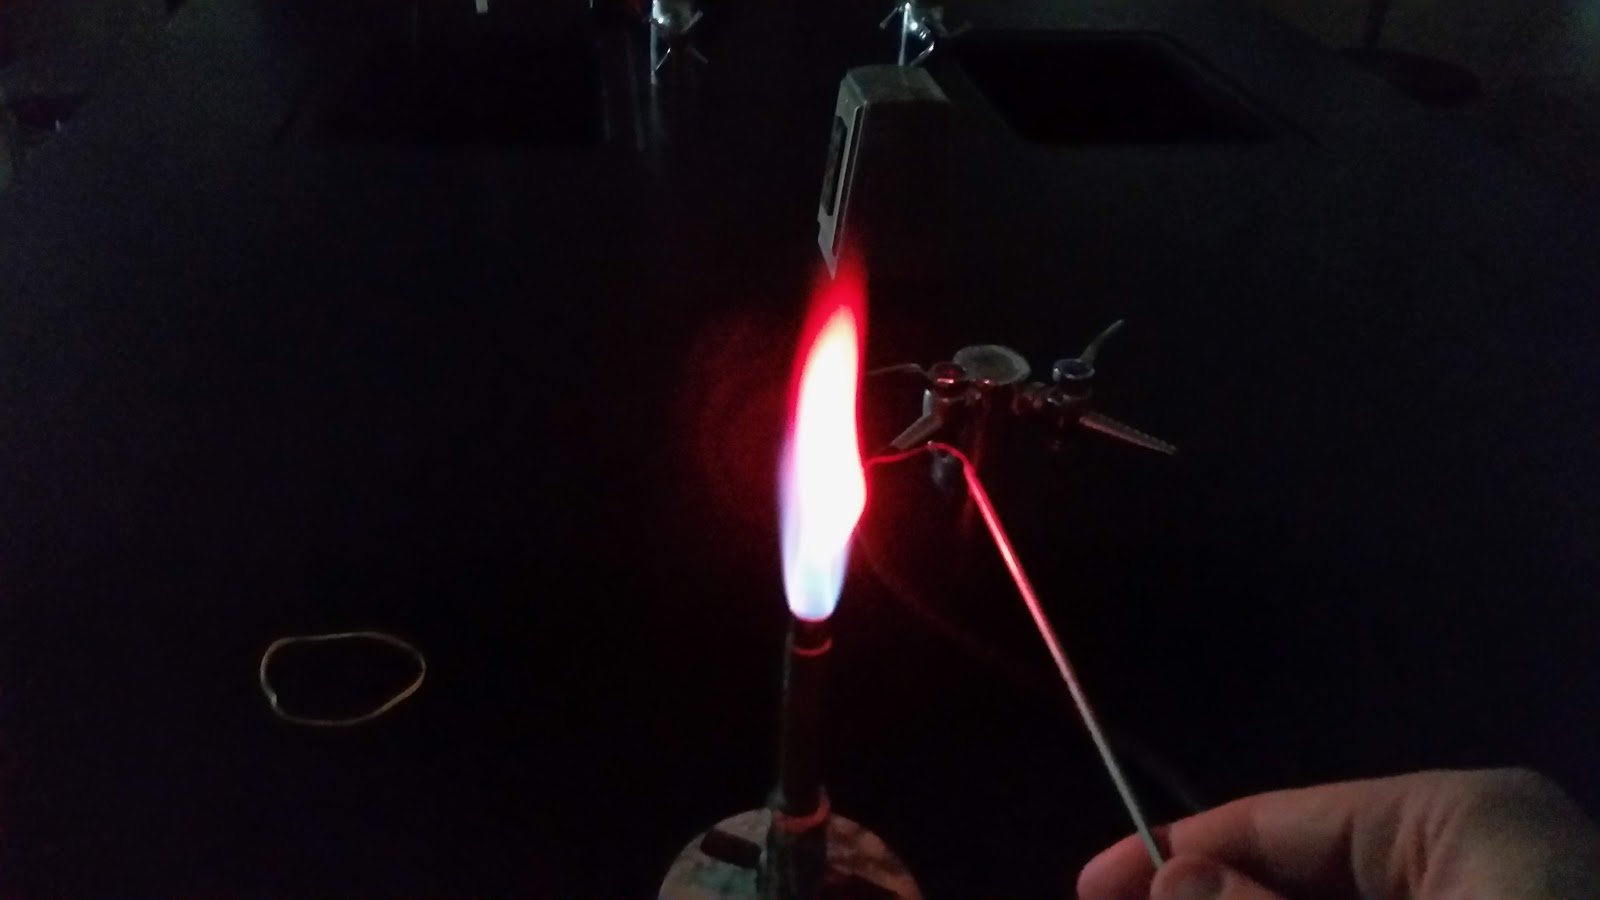
Figure 4: The same flame test results from SrCl2 and Sr(NO3)2
Post lab discussion:
We brought up the fact that the cation is the one responsible for the color and why we know this (see Figure 4). We again discussed why different chemicals produced different colors and how this is evidence of quantization of motion. At this point if you have not yet, introduce the Bohr model as a simple means of explaining light absorption and emission for electrons.
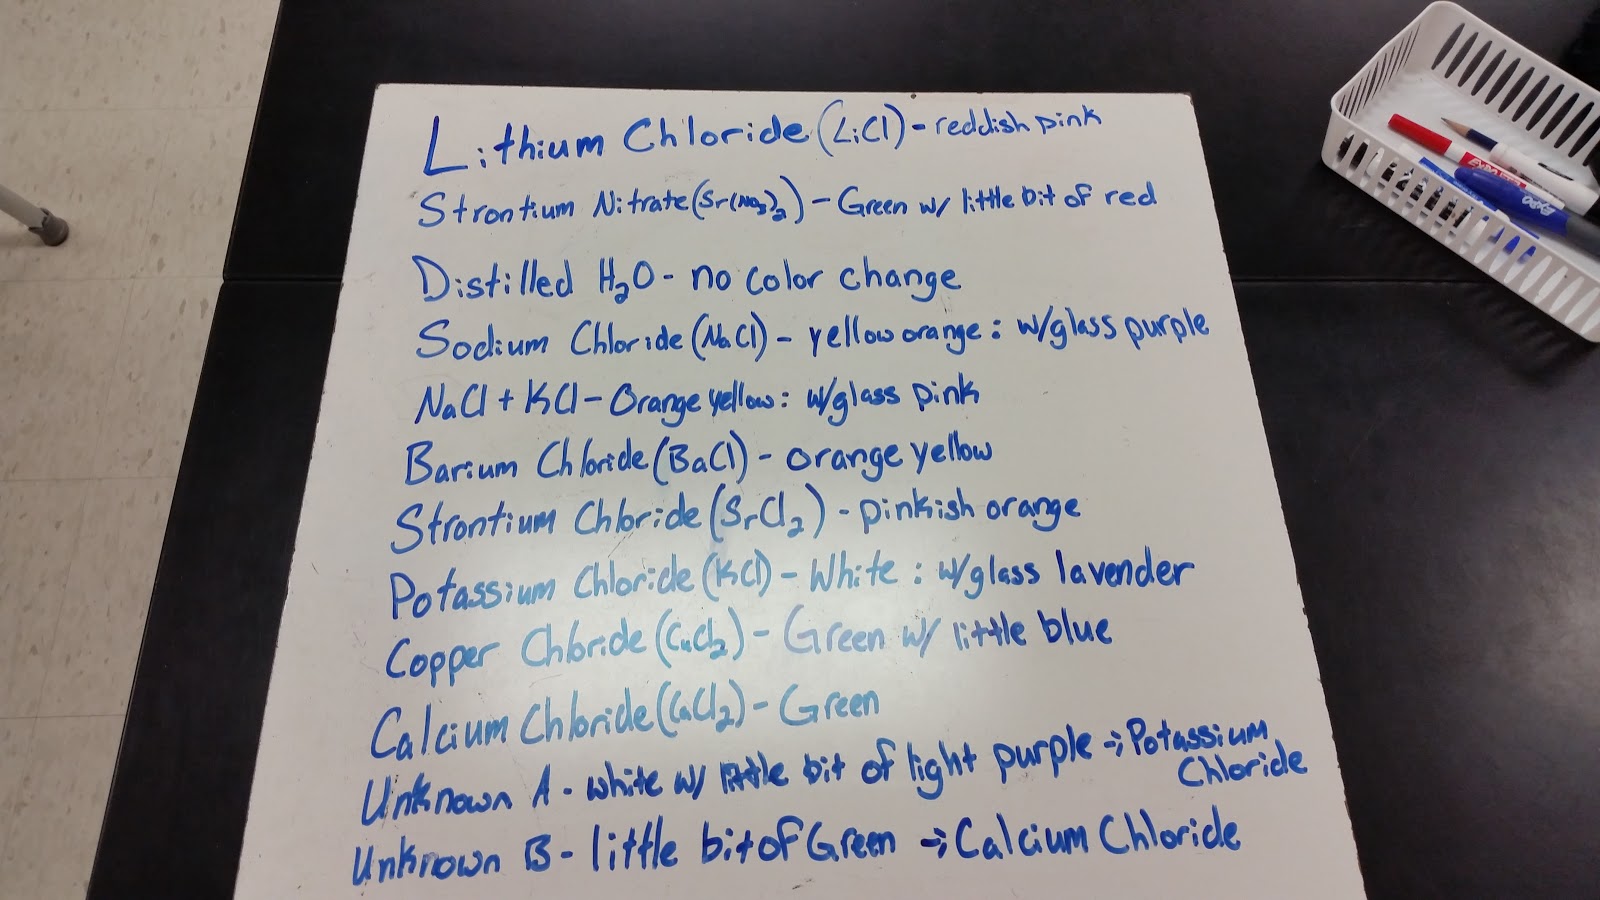
Figure 5: Student results of flame testing
Next I began showing how to calculate wavelength, frequency and energy for light.
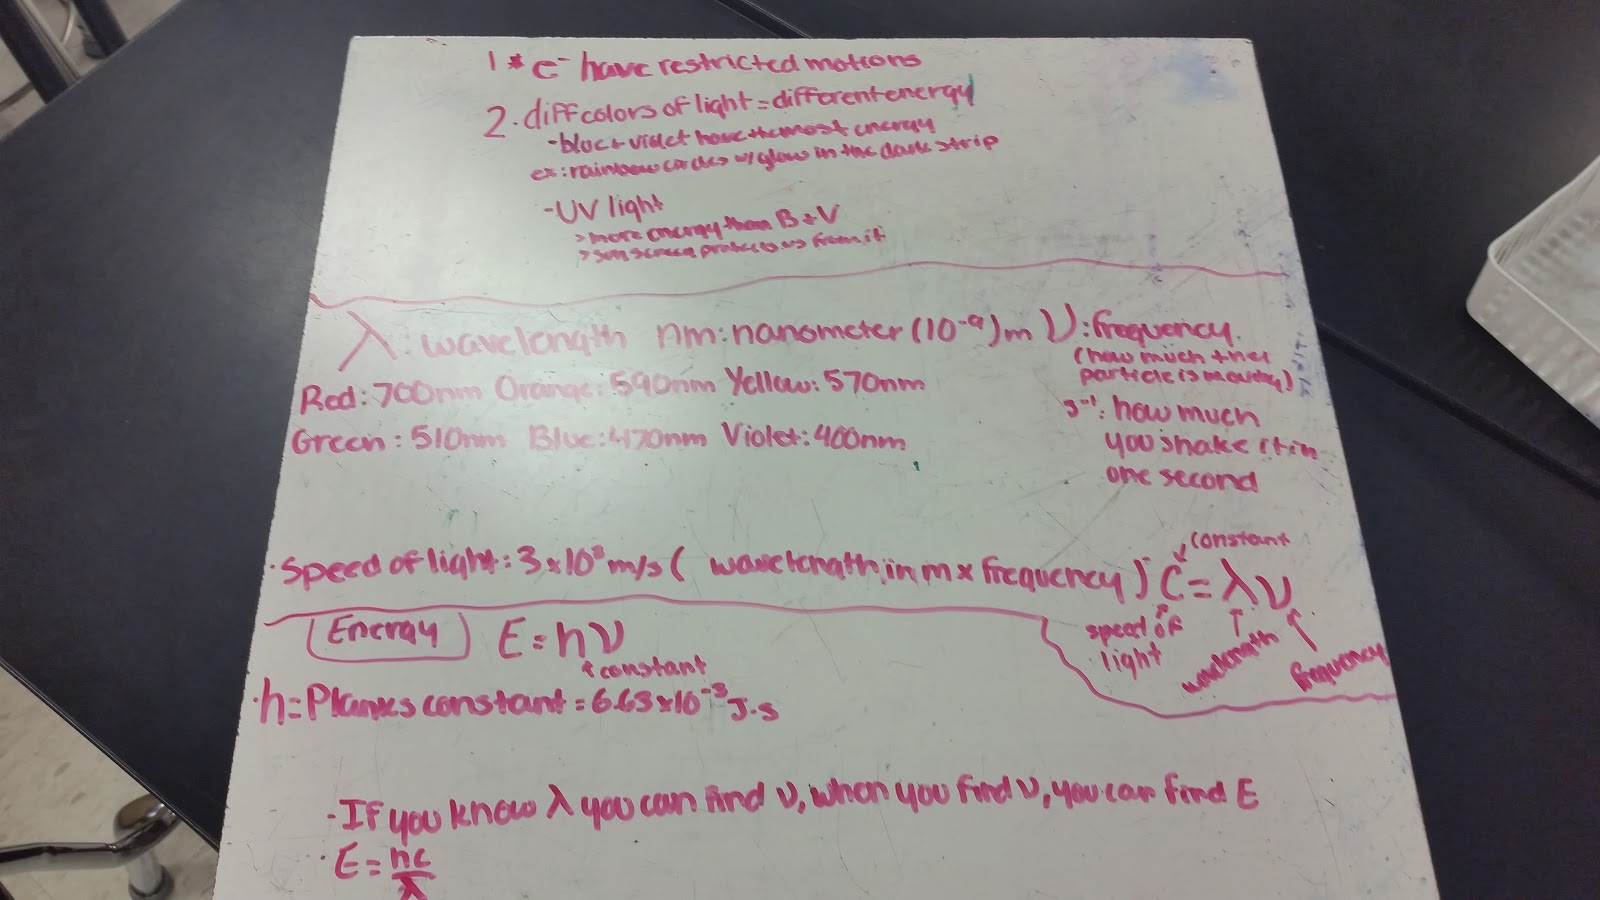
Figure 6: Student whiteboard after the flame testing breakdown
Activity 3: Play Doh
Now that we have the idea that we can deduce information about electronic structure from the light spectra, we now turned our attention to the rest of the atom. Students were told to construct a proton scaled up to about the size of a small marble. They were then told to build a neutron to go with their proton. The neutron should have been the same size or ever so slightly larger according to mass (volume considerations are quite complex). They then were informed to make an electron to go with their nucleus.

Figure 7: Student model of a deuterium atom built with Play Doh
Most students will construct an electron smaller, but not small enough. The electron should be nearly 2000 times smaller in mass (again volume is complicated). For the size constructed this means the electron should hardly be visible (or perhaps not). But this is where the critical question comes into play. If the nucleus is the size of a marble, and the electron is a barely visible speck, how far apart should they be? An atom is usually about 105 times larger in diameter than its nucleus. So with a nucleus that is about 2-4 cm in diameter, the electron would be about 1000-2000 meters away or about a mile. Most students will guess that they are far, but this needs to be stressed how considerably absurd this is. What is between the electron and the nucleus? The answer is nothing. And this is what we believe without questioning. So we must have had some very remarkable experiments for us to have such confidence in such a strange result.
At this point I then taught the Rutherford Gold Foil experiment and showed the following two videos (1 and 2). If you purchase the Element Vault, you can show students a piece of gold foil that comes in the book.
Through discussions of why gold was used and not another element, I bring up the notion that it would be good to develop a means of communicating the number of protons, neutrons and electrons in atoms and ions. I introduce the atomic #, mass #, charge and the location of the atomic # on the periodic table at this point. I would potentially do an activity with this, but I was cautious with my time here.
Activity 4: Average Atomic Mass (Candium)
This activity is introduced by discussing the resistance to Rutherford’s discovery. In particular as we learned about the nucleus and Moseley was able to identify the number of protons or nuclear charge with X-rays, there was controversy over hydrogen and helium. Hydrogen had a relative mass of 1, but helium had four times the mass but only double the number of protons. This led to the search for a neutral particle that had a mass similar to that of a proton and eventually discovered by Chadwick.
The average mass of an atom is something that is applied to a number of atoms beyond counting. Here we must learn how to take an average without doing the algorithm of adding up and dividing by the total number. To learn this methodology we use a fake element “candium”.
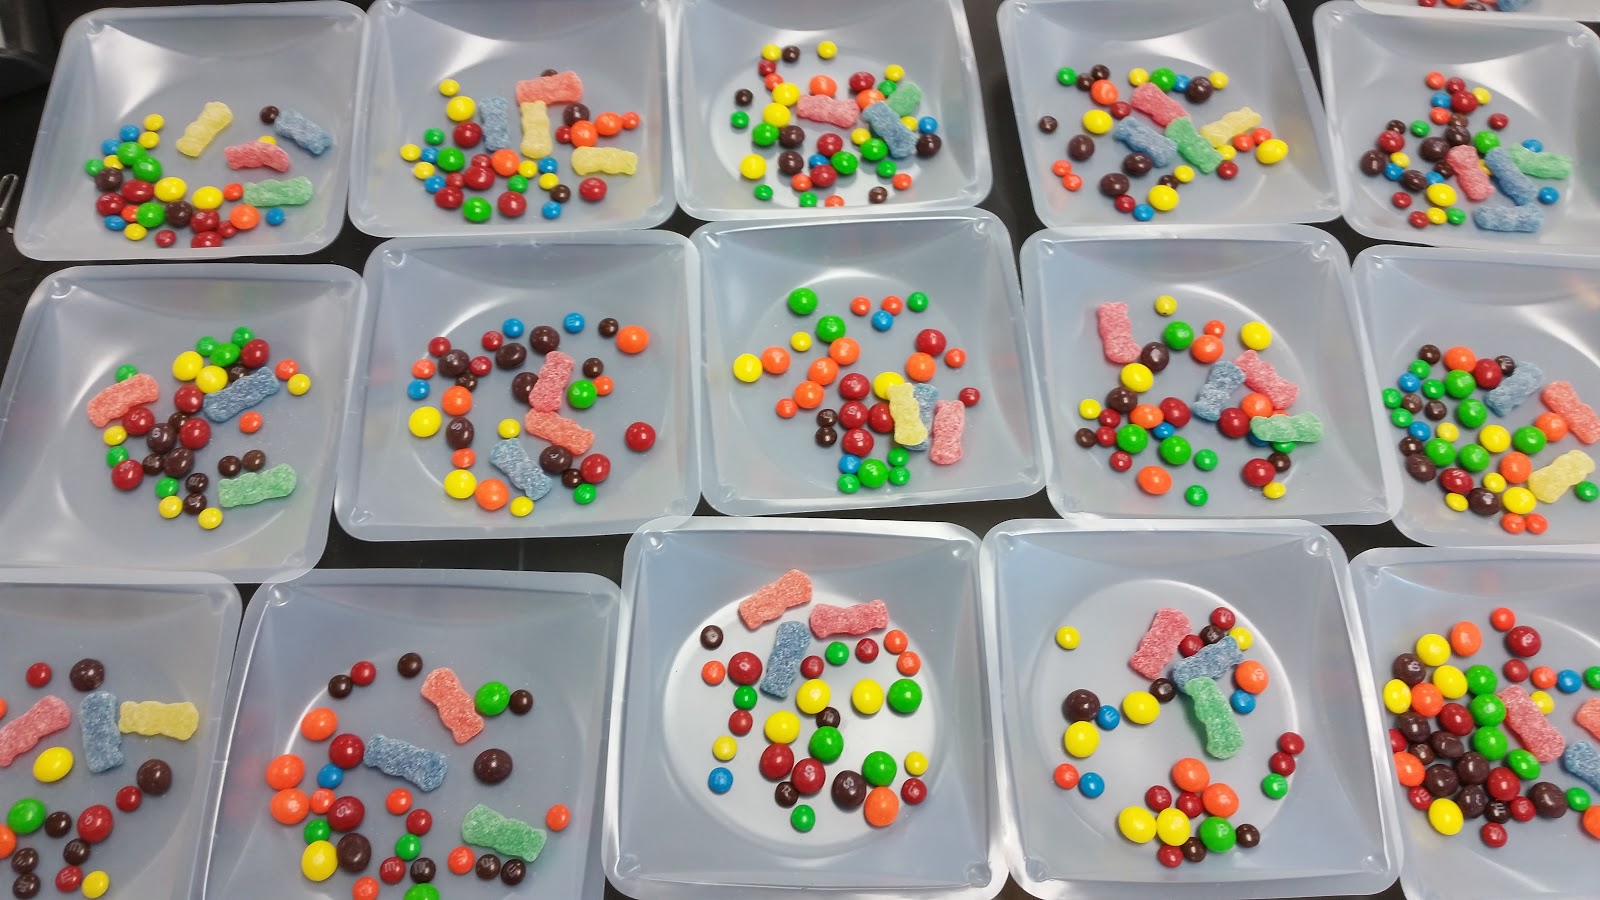
Figure 8: Samples of candium contain 3 “isotopes”
Students are guided through measuring the mass of their isotopes individually, counting each and then determining the average mass as they normally would. An example of a typical handout can be found here. They then are shown how to use % abundance and each isotopes mass to also find the same average. This is then compared with a mass spectra result for an unknown element to mimic the candium calculations with actual isotopic abundance data.
Activity 5: Electron Configurations and Electron Configuration Battleship
Electron configurations are labels that give information about the state of motion of electrons. Based on the emission spectra, it is reasonable to state that there are a lot of possible transitions for electrons. I teach quantum numbers here to give some background information about the knowledge we have about the motion. I then teach how to assign electron configurations using a periodic table. We also state the Aufbau principle, Hund’s rule and Pauli’s exclusion principle for guidance. A good read on electron configurations for teachers can be found here. After teaching electron configurations, electron configuration battleship is a great way to assess students.
Activity 6: Light demonstrations
Light is now approached with three objectives.
- Students should understand that light is composed of oscillating electric/magnetic fields. There are a couple of PHET simulations that are good at this, and polarizing filters can also be helpful. Corn syrup will add some flair to this demonstration.
- There are different kinds of light (radio, microwave, infrared, visible, ultraviolet, X-rays, gamma) but they are all the same composition, just vary in frequency, energy and wavelength.
- Light interacts with electrons. As light is absorbed, the electron moves up to a higher energy state (excited state) and then re-emits the light as the electron moves back down to the ground state.
This is a good time for a lot of demonstrations. Infrared light can be shown by having students watch a remote control through their phone cameras. Some pick up IR (usually not iphones, but other phones will). A black light (UV) can show fluorescence with a large number of things, but currency in particular is a fun one. A great demonstration for #3 is to distribute colored bouncy balls to students and have them throw them to you gently (be wary of other demonstration materials out). As you catch them, move up to higher energy states via furniture in the room. As you move back down to the ground state, re-emit the light.
Activity 7: More Quantum Scientists
At this stage I introduced the rest of the famous quantum physics scientists I wanted the students to know about.
Reflection - Students were assigned to write a reflection on the following prompt: Discuss the experiments and evidence that justify what we “know” about atoms and their subatomic particles.
Activity 8: Poster
For review, students were instructed to compose a poster that has a central theme of our new model of the atom. The four corners should include for themes of electron configurations, light, scientists/experiments and atomic structure.
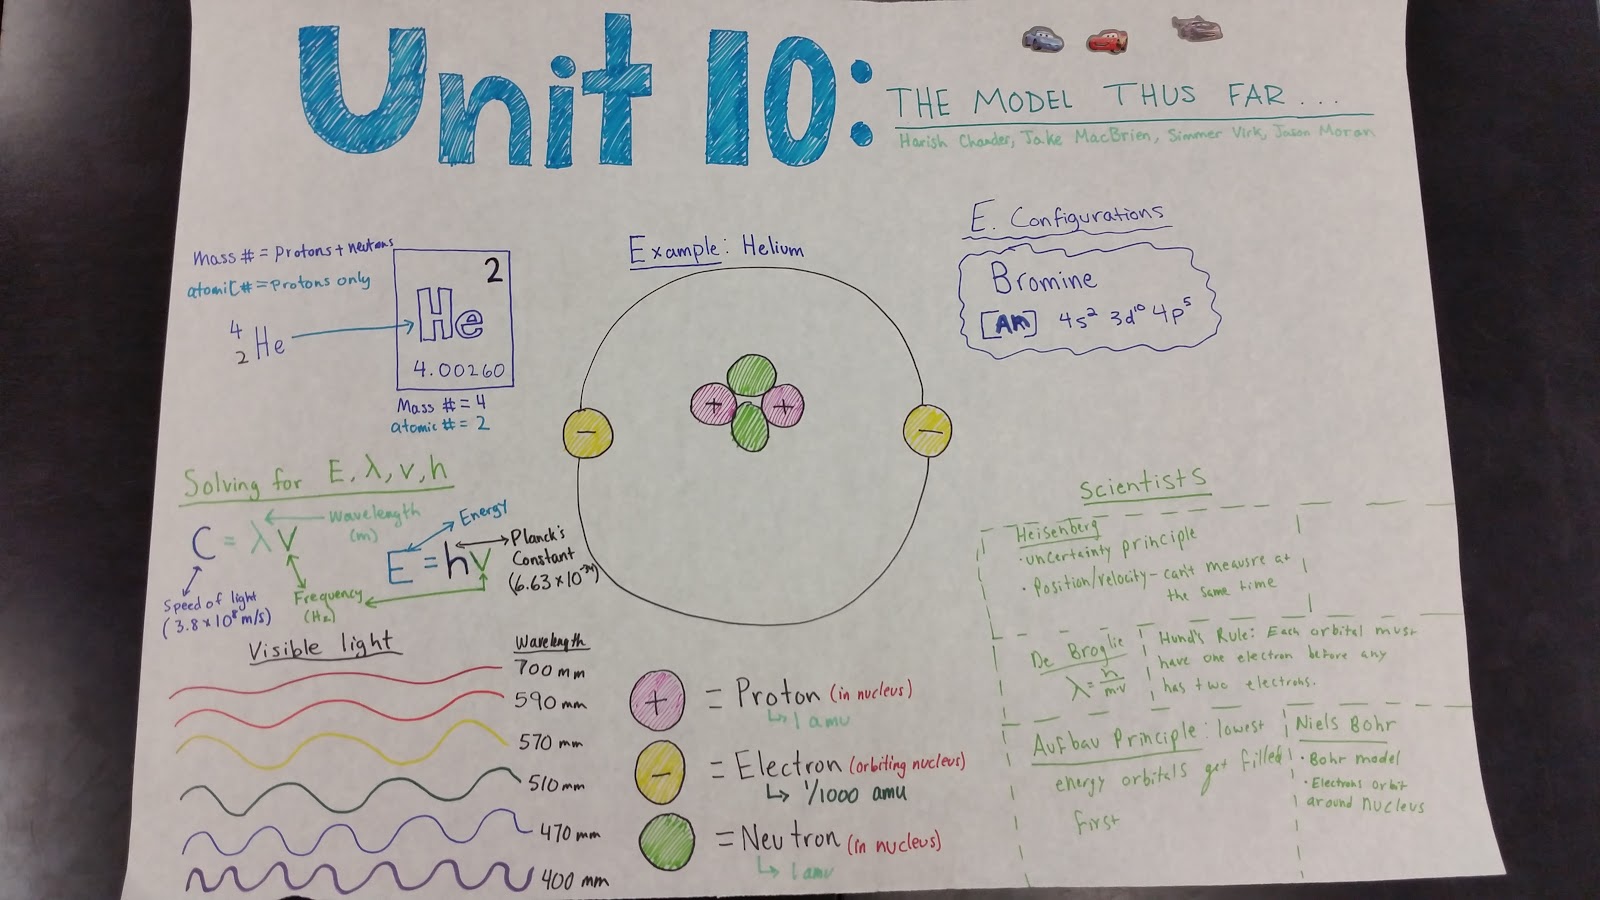
Figure 9: Poster review of Unit 10
Activity 9: The Models of the atom
This is a fun cut and paste activity, but it highlights the model of the atom through a historical perspective really nicely.
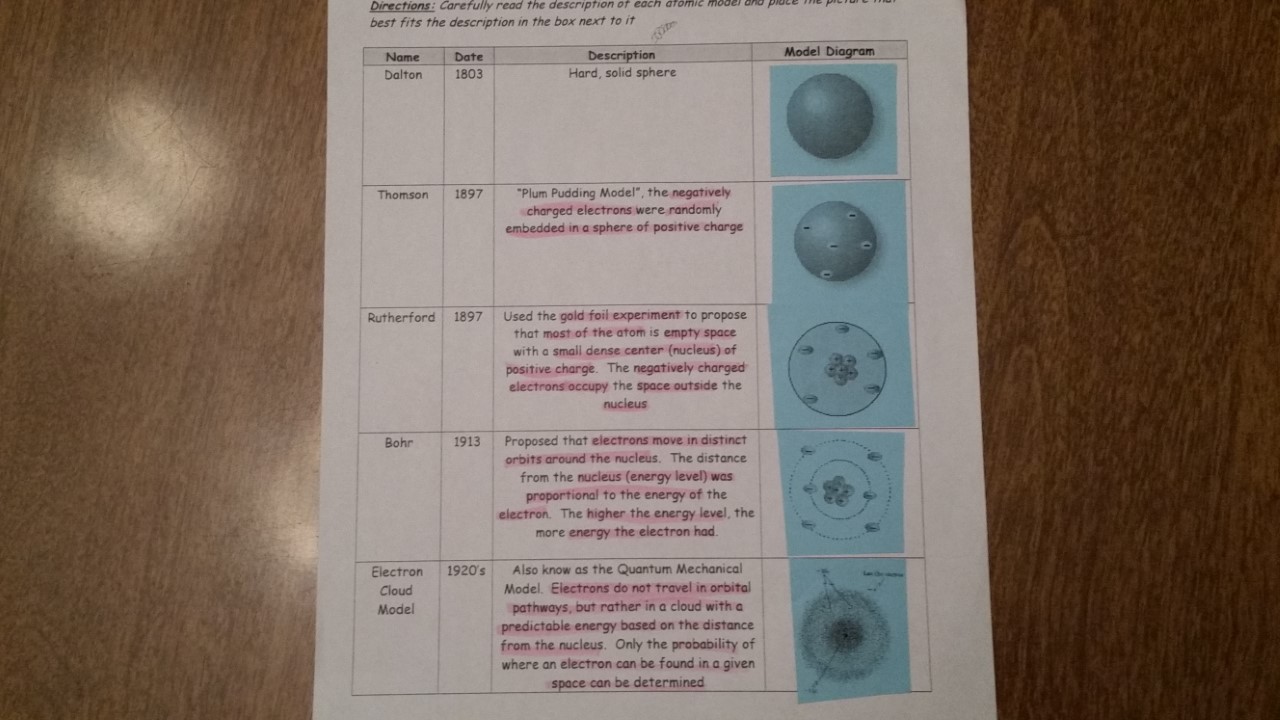
Figure 10: Cut and Paste activity for the models of the atom