Showing posts with label reflection. Show all posts

Sunday, September 15, 2019

Student Teaching Reflections

Lessons from student teaching
Classroom management
1. New teachers struggle to be direct. Learn what you want, then tell students what to do. Practice saying things like “I need you to put your phone away and pay attention” because it can feel unusual the first times you are in a role of authority. 
2. Avoid negotiating, compromising and undermining yourself when instructing students. Never say things like “you’ll need to know this for the test” or “if you pay attention for two more minutes maybe we can skip the next part.” 
3. Be wary of small things students do to test you. If you let them get away with minor things they will devolve into bigger things. It’s better for everyone to be clear about expectations at the start with the minor infractions. It is easier to correct something minor for you and the student.
4. Provide feedback when whiteboards are what you want and what you don’t want. We had issues with clarity and students writing instead of drawing. 
5. Students being noisy can wear on you mentally. It helps to pause, think about exactly what you want them to do, why they aren’t doing that and be persistent in communicating. 
6. There are 3 ways to engage someone’s attention. What your showing them can be engaging (content), you can be engaging (teacher) or they can talk (student). Work in all three of those.
7. When you are new, content is a struggle. So rely on your personality sometimes to help students focus. 
8. If students aren’t focused have them write something.
9. Move students’ seats around every unit so they do not stagnate into cliques. 
10. Measuring student infractions can be helpful for giving specific feedback. This should not be used to shame, just for information and to avoid bias.
11. Avoid getting in a trap where you always yell at the whole class. You can tell the whole class once. After that you should be talking to the individuals who are making infractions.
12. Some teachers have the expectation that all 180 students will behave and learn perfectly. Then they get upset when things don’t go according to plan. This is unrealistic and you should be mentally ready for deviations. Expect them. 

Grading
1. When students anticipate quick feedback, they work harder and produce better quality work.
2. Don’t make comments on student work, it’s ineffective use of your time and instead share feedback with all of your students 
3. Grading is exhausting. I try and set up my grading into chunks so I get some positive feedback when I finish a chunk. 
4. After grading a test is the best time to reflect on your teaching for the unit
5. Learn how to stay ahead of grading so you minimize questions from students and parents. Up front communication and timeliness will save you time. 

Teaching philosophy
1. Students are often put into diverse settings in a classroom with no instruction or guidance from adults. You are responsible for teaching them about how their perceptions can undermine their interactions with others. 
2. It is hard to teach. Often when we seek the easy way in teaching there is a transactional cost. If you use grades to keep students quiet, they will be quiet but you undermine their learning and your grading system’s integrity. It’s better to teach them to be quiet, but it’s also more work to do what’s right.
3. You can’t always do everything correctly in teaching. You should work towards it, but know that it’s ok to take some shortcuts.
4. When teaching goes well it’s awesome. Having students engaged and learning is a great feeling. Don’t ever forget how challenging and awesome teaching is.
5. It is totally acceptable to be kind to students even when they frustrate you. 
6. Try something new a minimum of four times a year. If it doesn’t work well, be glad you know.
7. You should be critical of your teaching, but you shouldn’t take it personally. As a new teacher you want to improve, but not in a toxic manner where you feel bad about yourself. The teachers you surround yourself with can influence this quite a bit either way.
8. Defeatist language is bad. Don’t let students say things like “I don’t know anything” or when you ask which problem was hard they say “all of them.” Correct them when they do this or it harms the whole class.
9. Learn to identify what the problem is and what the solution is. If students aren’t focused, your good teaching doesn’t matter. It’s always better to stop and redirect. 


Chemistry content
Unit 1 Measurement, mass and volume
1. What is the physical interpretation of the slope? What would a “for every” statement be for it? What are the units for the slope?
2. The slope of the y=mx+b for mass vs. volume can be used as a model to predict masses and volumes. The slope gives us some information about the particle level difference between substances with different densities.
3. Measurements are not numbers, they are ranges. The rules for rounding answers that stem from measurements are specific to maintain the appropriate level of uncertainty. It is helpful to show students examples with ranges (IE 6x4 = 20 but 6.0x4.0 = 24). The analogy of having about $5000 and finding a quarter, now how much do you have?
4. Students have bad ideas about particle spacing for solids, liquids and gases from illustrations in middle school. It takes a lot of effort to break these down in spite of clear cut evidence. 
Unit 2 Gas Pressure
5. There are direct/inverse relationships and there are directly/inversely proportional relationships. The distinction matters a lot. 
6. Sometimes gas particles collide more frequently, sometimes they collide more frequently and with larger collisions
7. All particles move all of the time. Evidence for particles in solids moving can be how solid objects feel cold and hot based on how fast the particles vibrate against your skin particles. 
8. Splitting up gas pressure demos into time segments greatly enhances your ability to dig into what’s happening. Look in particular for small amounts of water leaking or subtle volume changes 
9. Students get confused when you change three variables at once (PVT) because they overthink things. Keep them focused on two changes at a time, and towards the unknown variable. 
10. For the mason jar demo the small amount of water leaking opens up the discussion to higher levels
11. For the balloon in the bell jar demo ask how the pressure in the balloon changes 
12. For the can crush or balloon in flask, ask whether the pressure in the open flask while boiling is higher, equal or lower than the air pressure in the room.
13. For some demos, the change in temperature (kelvins) is insufficient to explain the magnitude of change (can crush, balloon in flask) n and V might also be changing
Unit 3 thermo
1. Heat is a term that meaning has become too diffuse. Use thermal energy instead to get better understanding. 
2. For specific heat capacity, students will mix up Q with C so its important to use their units to differentiate what they are. 
3. Heating curves are a struggle and students need more than just a curve with water. It helps to talk about slope and length of phase changes and how they can change.
4. Use blocks of various masses and temperature changes to test whether students understand specific heat capacity.
Unit 4 elements, compounds, mixtures
1. Volumes of gases can give information about what a compound might be, what can be done with solids?
2. Sometimes when we don’t know something, we can just assume something and see if it works
3. If a rock has the same % of each element no matter the size or source, that indicates whether it is a compound or a mixture
4. Separating mixtures can be done via distillation (boiling points/stickiness of particles), filter paper (particle size vs. filter hole size) or chromatography (stickness relative to the stationary phase).
Unit 5 moles
1. When teaching moles, the molar mass can be represented as a for every statement, a conversion factor, a means to compare amounts (if 18.02 g is 1 mol, 84 g must be more than 1 mole), it can be represented using pictures and it can be used as a relative mass.
2. Students that don’t know how to convert actually don’t understand what the molar mass means. 
3. When students struggle with math, it helps to add more units and labels in. It’s harder initially but helps them move past basic manipulations into what they are actually doing and using. 


Cognitive Science
1. The amygdala can have a big impact on learning. If students are angry or in fight or flight mode the ability to learn plummets. If students are happy they have stronger connections to what they are learning. This is why we easily remember movie quotes and songs. 
2. Asking students what they learned at the start of class gives them a chance to reflect and will help them do better in their other classes. If you do this consistently, they will work harder to remember other lessons. 
3. Students can’t learn when they are frustrated. But you also should not interfere with their learning to reduce frustration.
4. Don’t start worksheet problems with your hardest problems. Start with the easiest ones and let them figure things out without samples from you.
5. People believe things if you offer a reason, even if the reason is nonsense. They just hear that there is a reason (copy machine experiment)
6. Feedback should be more work for the student than for the teacher.

Discussions
1. Discussions are enhanced when students work towards finding out what they know instead of seeking an answer. Seeking an answer leads to limited participation, frustration and racist/sexist beliefs. Students that can practice starting with what they know learn more effectively with less frustration. 
2. It is imperative that students learn to put effort into their whiteboards during unit 1. They should use color coding, they should measure carefully, they should follow all instructions, they should think about what they’re doing, their particle diagrams should be clear what the intent is.
3. Whenever possible, call on students instead of taking volunteers. Volunteers show that you care about getting the right answer from someone. Cold calling shows that you want to know what a student is thinking. Use dice and a seating chart to find a random student.
4. You’re always talking to the whole group even when you’re talking to a single student when you’re in a circle. Project and be loud.
5. Discussions are very hard to lead when you’re new to teaching. You can get better by planning questions as you observe what students put on their boards. Find errors, unique representations, mathematical variations and start writing down questions to ask.
6. Learn to pause so students talk more. 
7. Phrase your questions so students can opine rather than be led. It’s better to ask, how small is 0.001 cm and see what students come up with than to ask “Do you feel like 0.001 is one of the smallest things you know of?” 
8. Talk about things you’re passionate about. Bring up past experiences and memories. They help increase learning retention and forming neural pathways.
9. Slow students down when they talk about similar topics. Mass, volume and density are all different but related. This means students will often substitute one when they mean another. 
10. During discussions you want to push back against student ideas to force them to think more, but you want to push back against the idea not the student. To do this you want to speak to the entire class and not interact too directly with a single student.
11. Don’t do thinking for students, but it’s good to frame what we’re discussing to focus the attention and reduce the cognitive load.

Miscellaneous
1. At Open House talk about what you’re passionate about. Don’t just give a presentation on mundane details but talk about some of your favorite things. 
2. Strategies to learn students’ names. Write down pronunciations on a seating chart so you don’t have to ask repeatedly or feel uncertain later. Put in a grade for students. Use retrieval practice when students are working. Use their names when you talk to them. 
3. Don’t answer student questions during the test. They can figure out the answer from the information on the test. By answering you are either being unfair or you are cementing in a wrong thought. Better to always shrug and explain ahead of time why you won’t answer.
4. It’s good to have a list of things you’d like to talk with students about that take 5-10 minutes for when you’re ahead in one hour (cognitive science, anti-racism, specific scenarios in school)
5. When you leave sub instructions that involve whiteboards, have students sent a photo to your email or twitter account so you can see how they’re doing.
6. Prepare for interviews by making a list of things you want to say (student situations, student work, specific lessons, books, philosophies)
7. During conferences, be wary of shouting praises for parents who might be having a rough conference nearby you.
8. During conferences, lots of parents just want to know that their child is happy during class and what they are like. 
9. Don’t criticize yourself to put yourself down. Only do criticisms that are productive.

Questions to ask
QTA 1. What would a measurement that was on a 10.00 cm line be written as?
QTA 2. A block of wood floats in water, what will the same block that has multiple holes drilled out do?
QTA 3. How do measurements or significant figures differ from numbers in math class?
QTA 4. #2 and #3 on worksheet 3, does a larger density imply more particles in the same space, bigger particles (or both)?
QTA 5. Can you show me a whiteboard that highlights what you’re explaining. This came in handy for when students explanations were unclear or confusing.
QTA 6. what makes Fierce cologne particles move the way that they do?
QTA 7. Does the pressure increase from more collisions, bigger collisions or both? 
QTA 8. What makes the particles move? If particles collide, what does that imply about their motion?
QTA 9.  Which is hotter, a teacup of boiling water or a bucket of warm water?
QTA 10. What is a compound and how is a mixture different?
QTA 11. Can water ever not be H2O? Could it be H3O? 
QTA 12. Do we have more or less than 1 mole?
QTA 13. What does the number 22.99 mean for Na?
QTA 14. What does the number 18.02 mean for H2O?
QTA 15. If there is 1 mole of CaCO3, how many total atoms and O atoms are there?

Weaknesses of Milam (find someone else to learn these from)
Weakness 1. I am not good at organizing the physical layout of the room. I don’t have a space for everything and I don’t throw stuff away frequently enough. 
Weakness 2. I am off topic too frequently and this detracts from my lesson timing.
Weakness 3. I’m arrogant. It’s getting better, but it’s still not good. 

Strengths of Milam
1. I see the good in all kids. I don’t let their mistakes define my perception of them.
2. I can anticipate what students don’t understand and ask good questions that allow them to do the same.
3. I reflect constantly about everything.
4. I’m creative and have fun at work.
Sunday, March 10, 2019

Daily student recaps

On a Saturday in late fall we held a follow up to our modeling workshop. One of the participants brought a colleague along with her. During one of our discussions she mentioned that she had been having students do a daily recap of the previous lesson. I thought the idea was brilliant and so I started having my IB chemistry HL class do it. I recently expanded the recaps to my chemistry classes. There are multiple benefits to doing this and I wanted to put them together and encourage teachers to try using this tool in your own classes.
1.  Students listen differently to their peers.
When I talk, the students trust me to say “correct” things about what we are learning. When a student is explaining that trust is not there. This causes students to listen differently with a more critical approach. If a student says anything that is slightly wrong or even if the letters they write are slightly misshapen they notice immediately. This type of critical listening is very valuable for student learning. They’re connecting topics and ideas and evaluating whether they fit or don’t. They should do this when I speak. Pointing out to them this discrepancy can be helpful for pushing their learning to a higher level.

2. What I think students know and what they actually know are frequently different.
Being able to see what a student took from your lesson is helpful. Sometimes teachers get wrapped up in the world of “But I told them once, they should understand it!” Spending time listening to students every hour to start things off builds a much better perspective of what they are learning instead of what you are teaching.

3. More student voice
At the start of this year I was nervous to call on quiet students during discussion. In the past students had given feedback that they would participate but that talking in front of everyone terrified them. It was a mistake to listen to that feedback. It created an unhealthy class dynamic where students sought out correct answers instead of focusing on what they currently understood. It pushed the idea that there are smart chemistry students and dumb ones. It was also racist and sexist in that some races and gender combinations were heard from more than others.
However, this is a concern for students and it needs to be handled well to be successful. When students say “I don’t know” during discussion, you’ll want to emphasize that the solution to not knowing something begins by starting with what you do know and building connections to those ideas. Frequently teachers undermine this by making statements about “being happy about mistakes” or “mistakes are opportunities to learn”. Instead it’s important to show students how to cycle through learning something new by seeking out a starting point of what a student does know and how to evaluate possible explanations, logic and evidence to build towards the new learning objective.
It is important not just to say this, but to keep a healthy approach as students do the recaps. Many are nervous but I see a lot of that disappear as I point out the good points of their recaps. As they realize the intentions of finding out what they know they produce more honest recaps. I would also like to say that I am frequently surprised at students that I would expect to struggle with a recap because they are quiet. These students are perfectly capable of doing an excellent recap and hearing from them improves their inclusion in the classroom.

4. Spaced practice
Spaced practice is the opposite of cramming. In cramming a set of ideas is repeated until familiarity sets in. In spaced practice the learning is split up so that forgetting occurs between the intervals of learning. The research strongly supports spacing practice. By allowing students to forget and then re-learn the material the impact on the brain is substantial. Doing a daily recap allows students to forget part of the material and then relearn it the next day. This leads to less forgetting and also better understanding.

5. Reflection
Students know that the next lesson will involve a randomly selected student giving a recap. When two or three minutes are left in a lesson the students can then reflect on what they learned and what they would present if they were to be selected the next day. This can help them evaluate and organize the learning.

This is a new technique to me but the value is already immense. I have thoughts on how to modify the technique such as having two students selected. One gives the recap and the other supplements additional ideas. The time varies because most students will talk for 5-6 minutes and not realize they had talked so much. Some teachers might elect to tell students the day before who will speak (which could be an issue if there is an absence). I roll dice to determine who will speak and they get no prep time to pull things together. Currently students can bring notes with them but they are discouraged from using them and not allowed to just write what their notes say. If they get stuck they are encouraged to ask questions to other students.

Sunday, April 16, 2017

Progression of Student Models of Light in High School Chemistry

Students were taught about light and then asked to write a reflection on what they used to think light was and what they now understand it to be.  The three principal lessons used are described below and then student comments in their reflections are used to evaluate the models they develop, the physics struggles and some reflection on what they need to bring with them from previous classes and experiences.  
Lesson #1 - Spectral Emission Lines
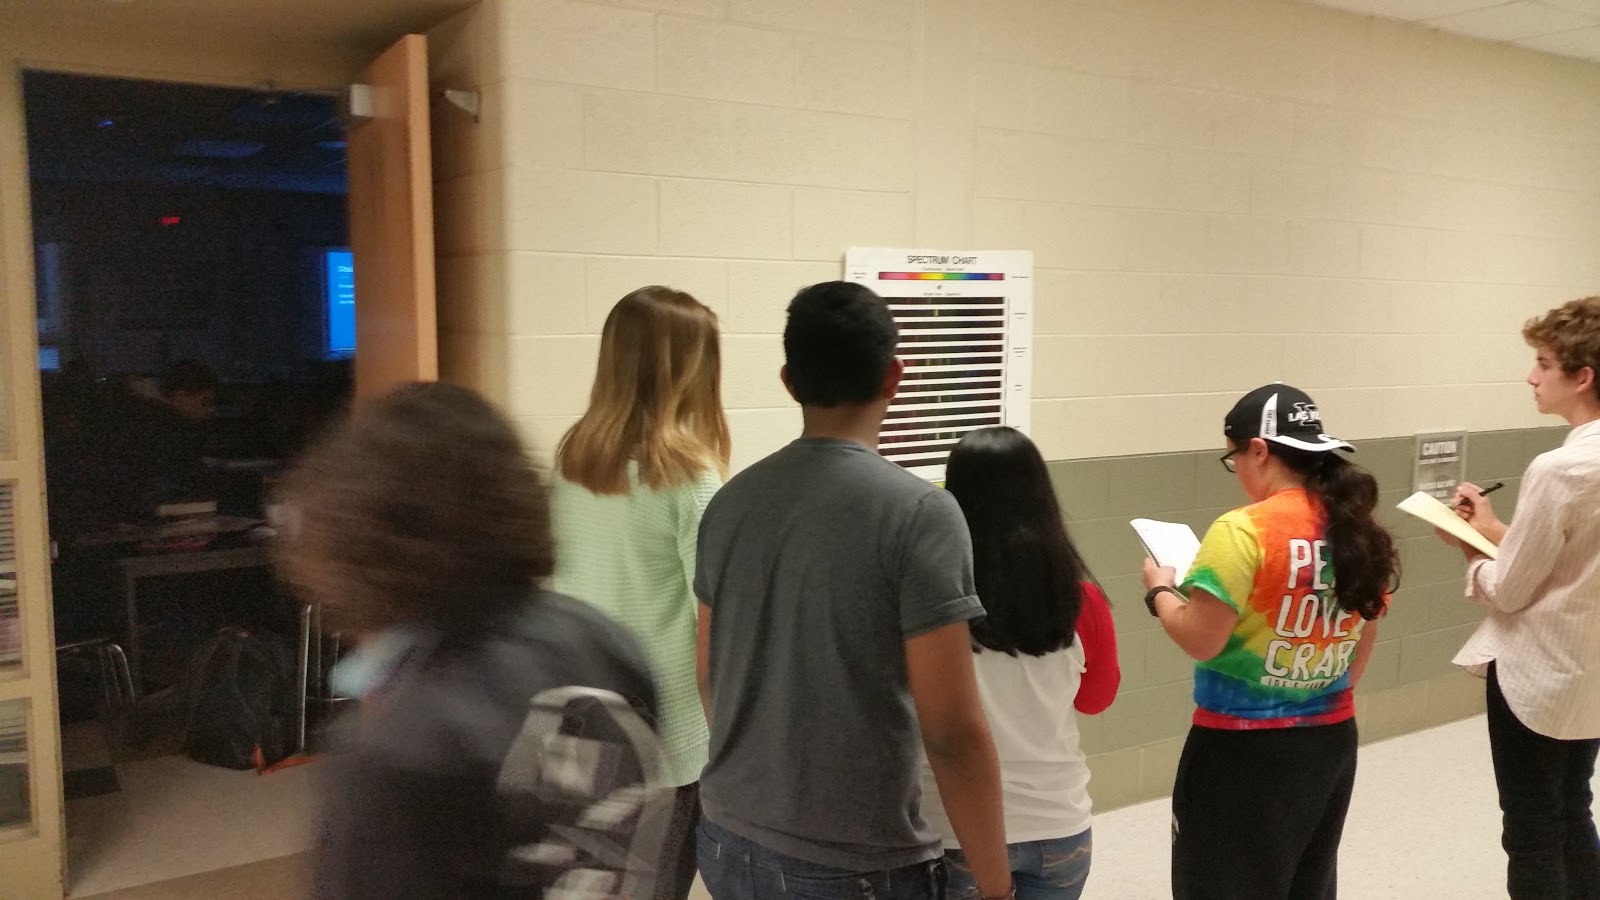
Students observe emission tubes using spectrometers.  They attempt to match the spectra they observe with spectra on a poster.
20160404_073212.jpg20160404_073306.jpg
Figure 1:  Students working during lesson 1


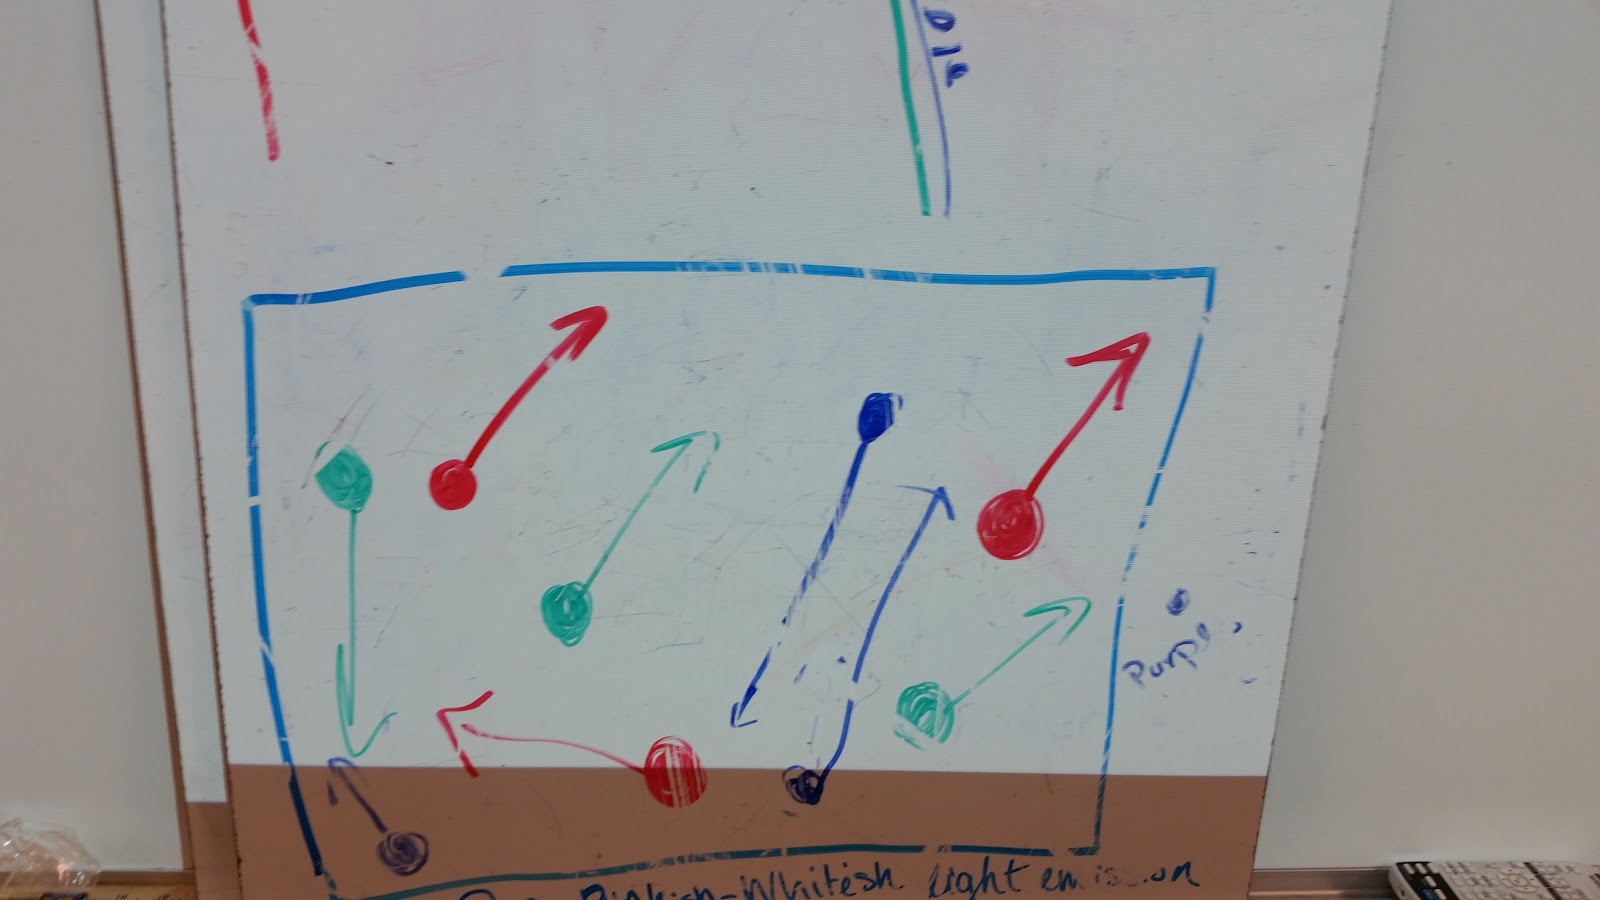
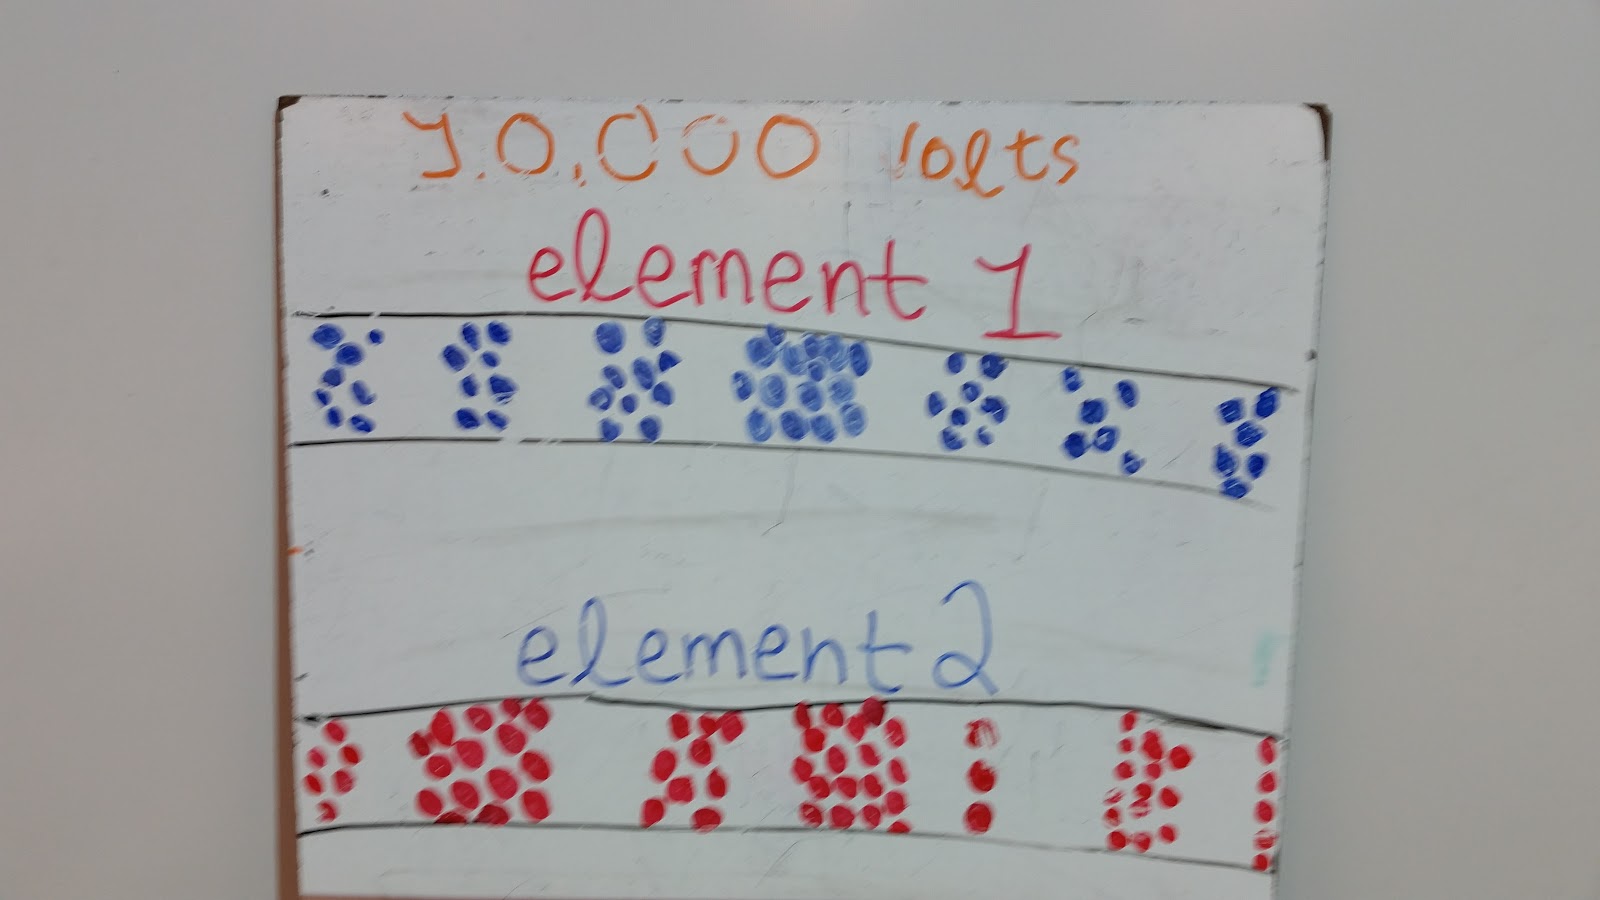
After the students have spent time observing spectra they are asked to complete a whiteboard that shows a particle diagram of what is happening in a H-emission tube at 10,000 V.  They are guided with two agreed upon observations, first that multiple colors are emitted and secondly that different elements gave off different sets of colors.  With 3 classes completing this task, there were eighteen whiteboards produced.  Zero of these boards showed electrons or charged particles.  Many showed colorful Hydrogen particles.  


20170321_075807.jpg
Figure 2:  Whiteboard of initial student model of light emission
20170321_075718.jpg
Figure 3:  Whiteboard of initial student model of light emission


20170321_115315.jpg
Figure 4:  Whiteboard of initial student model of light emission


20170321_115327.jpg
Figure 5:  Whiteboard of initial student model of light emission


20170321_115213.jpg
Figure 6:  Whiteboard of initial student model of light emission


The initial student models show that the task is very advanced for the students.  No boards show electrons in their models.  Some students consider the particles themselves to be the color of the light, some show faster particles producing different colors of light and one board (Figure 4) even shows the particles arranging themselves into a wavelength form where the bulk particle arrangement is the difference.  None of the students are even close to having a working model of why an element will only emit certain colors and not others.  


Lesson #2 - Flame testing
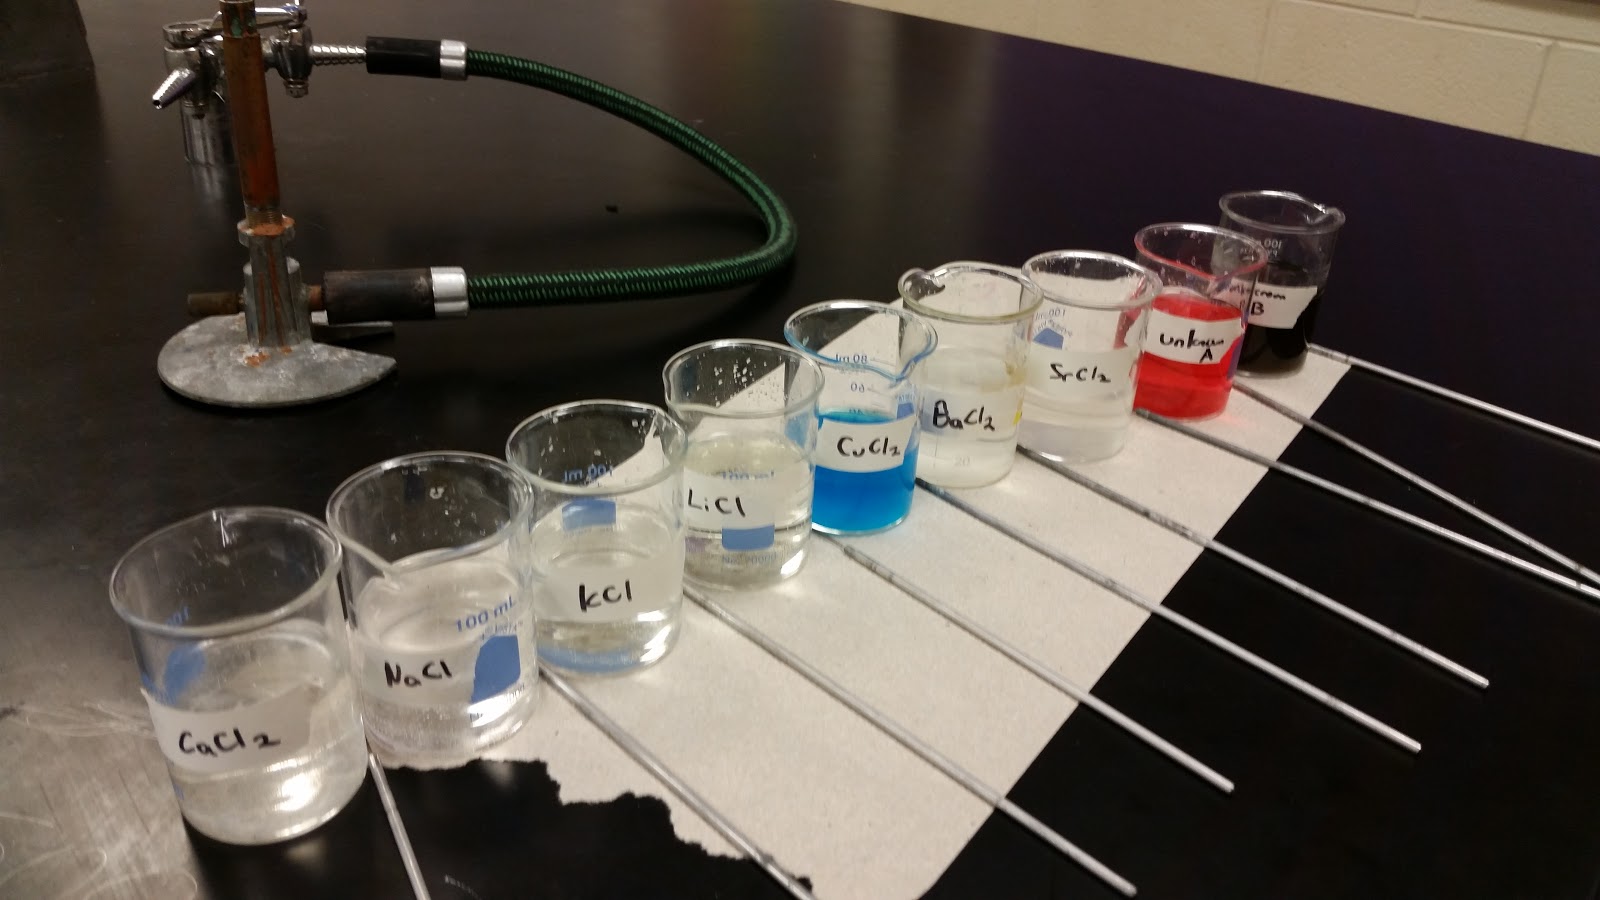
A continuation of the concepts from lesson #1, the students here are tasked with flame testing various salt solutions and then identifying two unknown solutions with food coloring added.  
20170321_143116.jpg
Figure 7:  Solutions to be flame tested including unknowns A and B with food dye added
20170321_115934.jpg20170321_115725.jpg
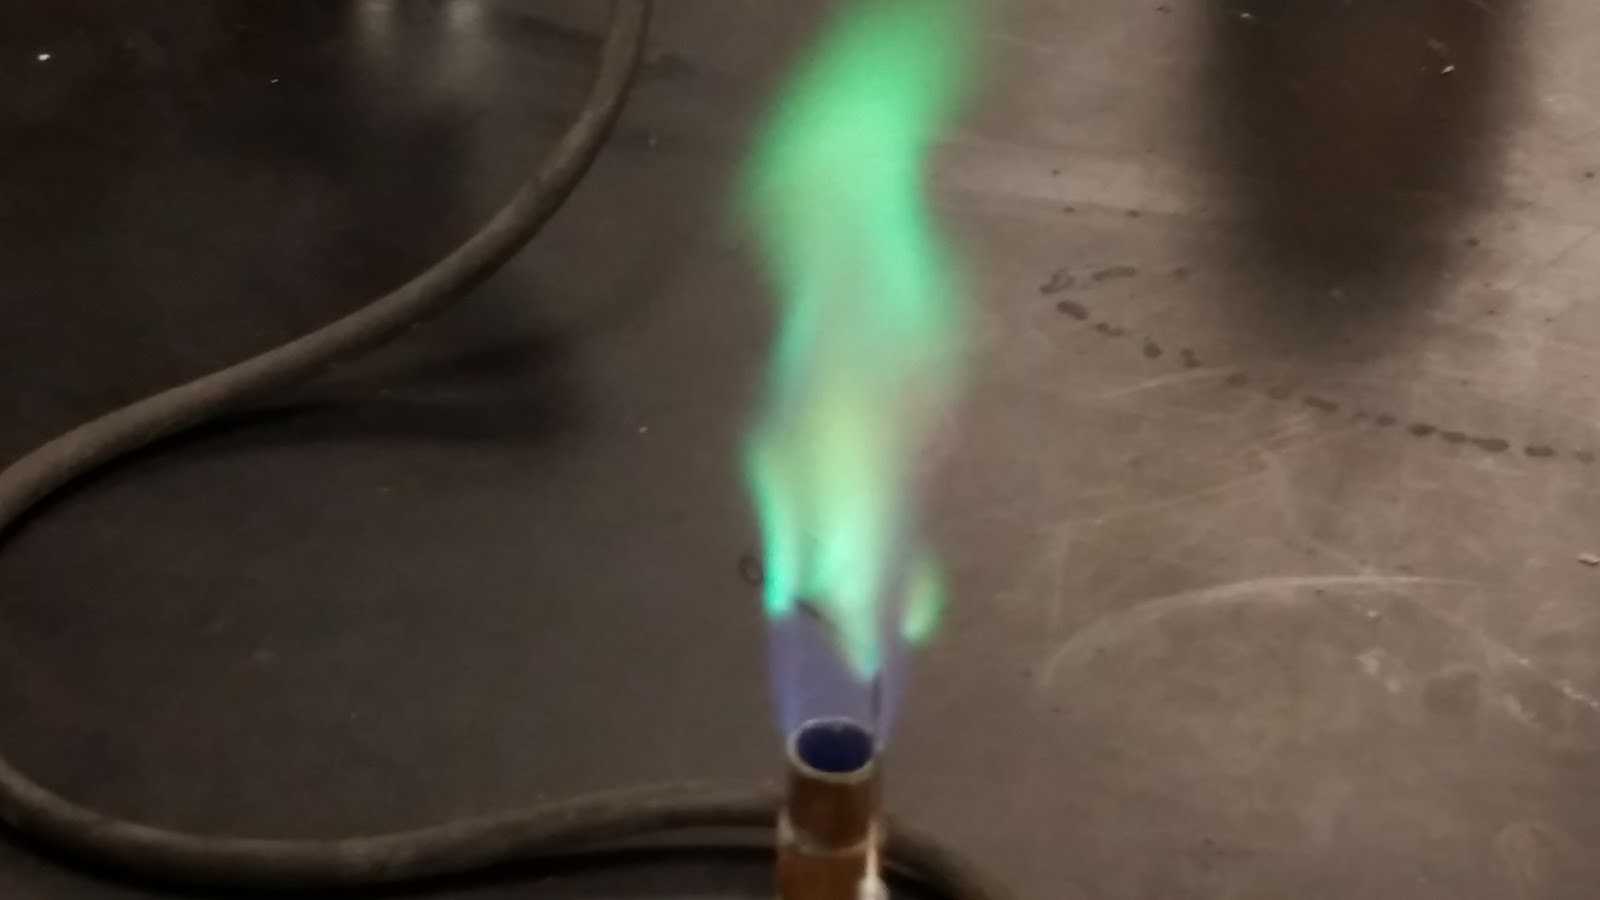
Figure 8:  Flame testing CuCl2 and LiCl solutions


The discussion here is kept to a minimum.  The key ideas are reinforced that the elements are producing different colors and each element is producing multiple colors of light.


Lesson #3 - Light demonstrations
In lesson #3 we begin with the intention of eventually explaining why a single element will produce multiple colors of light and why the colors vary from element to element.  But first we have to improve our working model of what light is and how light interacts with matter.  A series of demonstrations and guiding questions are used.  


What is light?  
It is easy to find a short-answer or definition to this question that avoids the deep thinking needed to really grasp what light is.  I begin with a demonstration of a ruler being attracted to a charged pool noodle seen below.
The purpose of this demonstration is not to understand how polarization works, rather it is to introduce the idea of a field.  How is that the ruler and the pool noodle can interact without touching?  Michael Faraday developed the idea of fields and here we establish that charged particles can interact without touching, at a distance.  We use the field idea to describe how these interactions would take place at any given point.  


We then immediately move onto a PHET simulation called electric field hockey.  The simulation is a game where you try to propel a charged particle into a goal while avoiding obstacles. The simulation allows you to show fields from the charged particles and also how they change as you shake a particle.  This disturbance to the electric fields is what light is.  This is a very challenging idea so we want to spend some time showing how two charged particles would interact via the field disturbances.  If we shake one particle, the electric field is disturbed which would then create a variation in force on other particles.  This process is what we call light.  The veracity with which you shake the charged particle will impact how much the change in motion the other particles have.  Here we set the foundation for frequency and how frequency influences the ability of light to cause greater or lesser impacts.  
Now is a good chance to show students an image of light that they would have seen in the past in a textbook.  A picture such as Figure 9.  
Figure 9:  A representation of disturbances in electric and magnetic fields1


Next I like to follow up with a demonstration on the optical activity of corn syrup.  This allows me to show the students some evidence of the electric field composition of light.  The corn syrup has 4 different groups bonded to carbon atoms that causes a change in the electric fields of light and it affects different colors differently.  
This is also a good chance to show the students the difference between a wave pulse and a standing wave as they likely have only seen waves presented as a standing wave up until this point.  I get one of the longer slinkies out and have a student hold the other end.  I start by setting up a standing wave and then show the students a wave pulse where I just give a brief shake of the slinky and the wave travels down the slinky and back.  I try and show how a series of wave pulses causes the standing wave as well.  If you get out the slinky it is worth it to go through frequency as the number of shakes per second and how this would translate to light waves (the number of shakes of the charged particle per second) as well as how this impacts the wavelength.  


What types of light are there?
There are 7 different types of light (radio, microwave, infrared (IR), visible, ultraviolet (UV), X-rays and gamma rays).  I use the PHET simulation of radio waves to show how radio works in their car.  For microwaves it can be fun to put ivory soap into a microwave or a candy bar.  For IR light some cell phone cameras can detect it (my Samsung 6 works well, iphones do not, older phones usually work) so put a remote control in front of the camera and it will display the infrared light as visible on the camera screen.  
For visible light I really like the photoelectric effect demonstration from Flinn Scientific.  Then at the end transitioning into UV by using the glow in the dark strip along with a transparent surface with sunscreen sprayed onto it.  
For purposes of memorization I like to briefly pause after visible and set the line between the safer forms of light and the more dangerous forms of light.  If you’re scared of radio waves from a cell phone, microwaves or from power lines you should be more fearful of light coming out of a light bulb.  In reality there is little risk from these types of light because they do not have the capability of producing changes in electron motion that can disrupt bonding interactions in DNA.  The final three types of light on the other hand are much more dangerous.  
For ultraviolet light a black light is needed to show various fluorescence demonstrations.  I also enjoy showing students various forms of currency under a blacklight and if you plan it in advance, many students have access to some at home.  
You probably will not want to do a demonstration of x-rays or gamma rays in class.  But there are lots of interesting talking points about both.  X-rays are dangerous, hence the lead protection for your organs.  X-ray technicians in hospitals wear badges that measure how much exposure they have had.  Pilots and flight attendants have their time in flight monitored to limit their exposure to higher levels of radiation while in flight.  Gamma rays are produced in stars, but also mostly absorbed before reaching the surface of the star.  
Finally a summary of the seven types of light is constructed.  Highlight that infrared is next to red in the visible spectrum and ultraviolet is next to violet.  I like to draw a line between visible and ultraviolet separating the dangerous light from the safer light.  


How are different types of light different/similar to one another?
This question ties the first two questions together.  The composition and origin of light is the same for all 7 types.  But we distinguish them so there must be some differences to contrast.  All 7 types of light originate from an accelerating charged particle.  Thus we loop back to the slinky and the frequency with which we “shake” or “accelerate” the charged particle.  The greater the initial “shake” the larger the “shake induced in the other charged particle that absorbs the light.  To put the shaking into perspective we should now look at light mathematically.  Here we now go through the equations for speed, wavelength, frequency and energy.  I stress that the speed of light is constant in ways that do not make sense (special relativity) in our everyday experiences.  When people say that light slows, what they’re really saying is that in some medium light spends some time absorbed and thus is not moving the whole time and thus appears slower.  I then present the equations for light calculations and discuss the units of frequency and try and compare wavelength, frequency and speed with turnover, stride length and speed in track.  
In the end the differences in light really stem from how suddenly the charged particle changes its motion or how much the charged particle accelerates.  


How does light interact with matter?
We now have a much improved model of light and can now interpret the crazy results of light emission spectra.  We only see certain colors of light from an element.  This means that the changes in motion of electrons in an element are restricted.  A change in motion can occur, but the starting and ending points of those motions are limited.  Electrons in atoms have defined, discrete or quantized motions.  We can represent these motions with circular orbits in the Bohr model of the atom.  When an electron is an orbit it can absorb light to change its motion.  But it can only change in discrete values, which is really weird and unexpected based on our prior physics knowledge.  But if the electron could move in any way, we would see all colors coming off of the spectral tube, not discrete light frequencies.  
Why do different elements give off different colors of light?  The motion of electrons differs in different elements because they have different numbers of protons and electrons.  The forces from these particles influences the motions capable for the electrons and thus what types of light are produced.  
A good way to demonstrate this is to take some colorful balls (make sure all glassware is put away first!) to students and have them toss you a red photon or an orange photon.  I don’t absorb the red or orange photons, but a yellow photon causes me to jump to a higher state of motion represented by standing on a chair.  When I return to my original state of motion (represented by the ground) I emit the yellow photon.  A blue photon causes me to rise up to the desk and I emit a blue photon when returning back to the ground state.  A violet photon causes me to rise up to a textbook on top of a desk (energy levels converge as they increase).  


What challenges are there to learning about light
Circular motion is already challenging for students to understand using classical physics.  Adding in the quantum restrictions makes this worse and not having any end game for visualizing motion makes it even worse.  Many students have misconceptions about circular motion such as thinking there is no gravity in space (or that the motion of orbit negates gravity), they have misconceptions about a centrifugal force balancing a centripetal force or they just do not understand the combination of forces and motion that result in circular motion.  To compound on these shaky initial settings, we are describing circular motion as not producing light (when the charged particle is accelerating) and only when the circular motion is altered do we see light.  
Our model for representing motion states are lines that indicate position.  When we draw orbital diagrams we represent a motion of an electron with a single line.  
Students may not know what a field is.  The idea of representing what could happen with a field is very abstract.  Many have seen magnetic fields represented using iron filings, but the concept is a challenging one.
The standing wave of light makes it look like there is an up and down motion of something.  Really the strength of the electric field is changing, so the arrow moving up is indicative of how strong the electric field is at that point.  
Students are very early in their development of what charge is.  From unit 6 they should understand charge as being connected to electrons and protons and that it causes attraction/repulsion, but what is it?
There is a lot of lingering confusion over vocabulary words that were introduced before the concept was understood.  Electromagnetic radiation and energy are two that cause hang ups that probably should be dropped out of initial teachings of light prior to high school and electromagnetic radiation might not ever be useful in learning about light.  


Student reflections on light (see next section for quotes)
What models did students bring and leave with?
Initial models for students were very incomplete.  I struggled with this because I had a hard time determining what it was I wanted students to know initially.  I am not sure what models or concepts I need students to have in order to make this lesson run better.  Maybe the relationship between speed, wavelength and frequency could prove helpful.  Many students mentioned not knowing how light would originate from a light source as something they were initially very surprised by not having ever thought of.  Some talked about only thinking in terms of reflection, but never origination of light.  I also am looking at this through the lens of chemistry, but a biology or physics teacher might have different hopes for what students begin with.  
Final models varied and most students picked some concepts up but not all (or not all were expressed in the reflections).  The concepts students picked up on also varied and many conceptions still need developing.  One of the most common issues is that students view orbital diagrams as a stand still position (S1, S4, S9).  It’s easier for them to see the Bohr model rings as an electron moving in a circle, but when we represent arrows on lines for quantum mechanics they tend to hear a lot about moving up, or moving down and they do not translate that into the 3D scale of an atom and how the electron is moving.  A good example that does attempt this is S21.  
Many students did well in adjusting the Bohr model to the quantum mechanical model in the sense that they understand that orbiting electrons is insufficient but that actual motion is much more complex and that we cannot observe the motion directly.  Students in the midst of clarifying this can be seen for S10, S11, S13, S17 and S23.  
Many students have connected light with charged particles or electrons and have an emerging understanding of the connection between the two.  There is some lingering confusion on what charge is that comes out (S5) and some express confusion over the overall complexity (S8, S19).  
The physics does not present itself to be a problem thus far, but you can find bits of physics ideas about circular motion that could be problematic down the road and require addressing in a physics setting (S22).  
S12 and S16 show how the term energy was used to avoid learning and being curious about what light is.  If light is energy there is no need to experiment or think through the origin of light.  While the electric field disturbance is more conceptually challenging, it can be supported with evidence, represented using a model and retains the curiosity of what is going on with light that can be interfered with when using energy.  S10 perhaps shows a similar sentiment for the term spin that it is not understood.  The solution for spin though is probably beyond this class level.  
Many students had very negative descriptions of their initial models of light and would make comments that they knew nothing and now know everything (S8, S18, S21 and others not transcribed).  The metacognition in the reflections was often quite poor and described learning in a simplistic manner.  I did not know it, but now I do.  There was often a lack of progression through connecting ideas and concepts together to build more developed understanding of light.  Students instead frequently expressed that their initial ideas were wrong, and the new ones are correct to describe their learning.  


Student quotes from their reflections at the end of the unit
S1 Understanding that light is the changing positions of electrons helped me understand more on what and how light works.
S2 Electron movement gives off light
S3 The element changes when the number of protons changes
S4 I know that light is produced when the electrons in an atom are hit with energy and moves the electron to a different orbital on the atom that is higher than the one it was on.  After this the electron falls back down to its original position and when this happens energy is produced in the form of visible light.
S5 The visible light we see is caused by the electron receiving enough charge to move orbitals.  
S6 It (light) is produced by the movement of the electron around the nucleus.
S7 This unit, I was able to really understand the relationship between protons, neutrons and electrons.  I always learned that they were connected but I never really knew how.  
S8 I never really realized that light had so much to it.  I knew the basics of light, like the stuff they teach you in middle school, the boring and stupid stuff.  Even though what we are learning right now is so complicated and has a lot to it.  
S9 I now know that light is emitted when an electron jumps to a higher level and then falls back down to a lower level.  
S10 Now I am under the impression that it’s more cloud-like as they move so fast and don’t follow a simple pattern like I thought.  The idea of orbitals was also very new to me.  
Also I learned about electrons having up and down spins, which I still don’t really know what it means.
S11 When an electron changes motion due to additional energy, it changes energy levels, moving up orbitals (s,p,d…).  The higher the energy level, the light produced will approach violet on the visible light spectrum.  The lower the energy level the light produced will be on the red side of the visible light spectrum.
S12 All that I thought I knew about light was that it came to Earth mainly from the sun in rays and that it was a form of energy.  
S13 Now I’ve learned that light is made up of charged particles that change how they move and accelerate.  The particles move direction and distance and can be in one type of motion or another, but scientists have discovered that they have no intermediary motion or “in between”.  
S14 I also had a basic understanding of what light was but I did not know what was light doing, like how does it come to be.  
S15 I didn’t understand why we use that [Bohr] model.  Now I understand why that model exists and how it was developed.  
S16 Before unit 10 I thought light was simply rxn energy emitted by the sun.  But as we got to learn more and more light comes from charged particles that accelerate.  Light is made out of electrical fields.  
S17 I knew that electrons spun around the nucleus in levels with more electrons per level the further away the level was from the nucleus.  However, I did not know that the electrons spun in specific orbitals.  I thought that the electrons spun in clouds at a certain level and stayed there for each element.  Now I know that per energy level, there are different ways that an electron orbits the nucleus.  For example, s orbitals move in spheres while a p orbital moves in sort of hourglass form.
S18 Now I realize that I actually had no idea at all what light is and why it’s there.  Now I know that there’s light when a charged particle accelerates (is moving).  A clear definition of light is disturbance of the electric field.
S19 Different elements have different paths because they all have a different number of electrons.  Carbon has 6 electrons while magnesium has 12 electrons.  They would follow different paths because of their different electrons.  This concept is still a little unclear to me but I understand it more than I did before.  
S20 Charged particles change their motion and accelerate.  Light are disturbances within an electric field.  
S21 Before my perception of light was that it was some kind of charged particle.  To be honest, I wasn’t even very clear on what light was.  On the day that we did the spectra lab, there was a bit more insight on how light was produced.  I only knew that color appears by an object reflecting a color, but to produce a color without any initial light stumped me.  I didn’t understand how light was produced or what light really was (like if it was actually a particle or some kind of energy?).
I think on a 2d platform, the idea of light hitting the electron, stimulating it to move to a higher energy orbital and then falling back down to its original energy orbital, then making light is easy to comprehend.  Bringing in the 3d orbitals are harder to comprehend and I don’t think I can visualize or completely understand the interaction from that perspective.  
S22 Before this unit, I simply knew that electrons floated in rings around the nucleus, where the protons and neutrons are located.  
S23 In middle school, we learned how to balance atoms with 2 electrons in the first ring and so on.  Now I’m aware that each “ring” is a different energy sublevel.  
S24 Light comes from charged particles (e-) and these charged particles give off light  when they change how they move.  Electrons move in a circle in different energy levels, these energy levels are different for every element.  
Overall, I learned more about what light is (electric field that is changing and is also a disturbance in the electric field).  
S25 The electrons in the orbitals can move up and down to make light/energy.  
S26 I finally understand the up and down arrows represent electrons and the direction is the spin and how there are always two on a line.  
S27 I at least know that light is the disturbance in an electric field.  


How should we adjust our teaching of light?
Avoid vocabulary as much as possible.  Teaching students terms just gives them the means to avoid learning the concepts later.  The phrase electromagnetic radiation serves no purpose that I see and should be discontinued unless you have some specific rationale for using it.  It obfuscates the connections between similarities and differences in light which makes it harder for students to learn later.   
Is the standing wave model a good initial model for waves?  On the one hand it is more visually appealing, but sometimes simple means less mental struggle and students can avoid grappling with the concepts.  A wave pulse should be seen by a student as this is usually a more accurate description of what is happening with electrons, and is a more general waveform.  
Emphasize what the line in an orbital diagram represents.  Many students that grasp the majority of the concept think of the line as a position (S1. S4. S9) instead of a description of motion.  The 1s orbital represents an electron moving mostly close to the nucleus with 0 angular momentum.  The 2s orbital is a similar style of motion, but a little further from the nucleus on average.  A 2p orbital describes a different style of motion with angular momentum.
Teach calculations in conjunction with electron configurations and orbital diagrams.  Emphasize the process of an excited electron emitting a light wave by altering its motion, light traveling to another electron, that electron changing its motion.  
As understanding grows, consider addressing why different elements give off different colors of light again.  What role do protons play in this?  What role do other electrons have on shaping the actual energy levels we use in orbital diagrams?  


What lingering questions do I have as the teacher?
We often talk about electrons changing quantum states, but I too struggle with the picture of this.  For example, if an electron moves from n=1 to n=3 and this is accompanied by an absorption of UV light.  How is the energy of the UV light distributed?  How much of it is kinetic energy?  How much is potential energy?  Are those distributions constant?  Are the kinetic energy and potential energy of an electron moving about the atom static beyond the uncertainty principle?  How can this be given that the radial position is not static?  What visual components of electronic motion in an orbital state can or should a high school teacher be presenting?  What is the evidence that justifies these?  


I also do not see how the photoelectric effect is in violation with light being a wave.  I get the construct of a particle model, but it appears that there is overwhelming evidence and logic on behalf of the wave model and to me the photoelectric effect shows that light waves act in a singular basis when interacting with matter.  The intensity does not preclude wave behavior because it is not possible for multiple light waves to combine at the exact same point because their speeds are uniform and their origination always happens at different positions.  It seems to me that we were premature in our conclusion from the experiment and now this assertion is not wrestled with and it should be.  Does the particle conclusion from the experiment rely solely on particle being defined as a singular unit?  If so, why can a wave not be defined as a single unit and still retain being a wave?  It seems simple to have a single waveform and thus no experiments would ever show light acting in a manner unable to be explained using purely wave mechanics.  


References